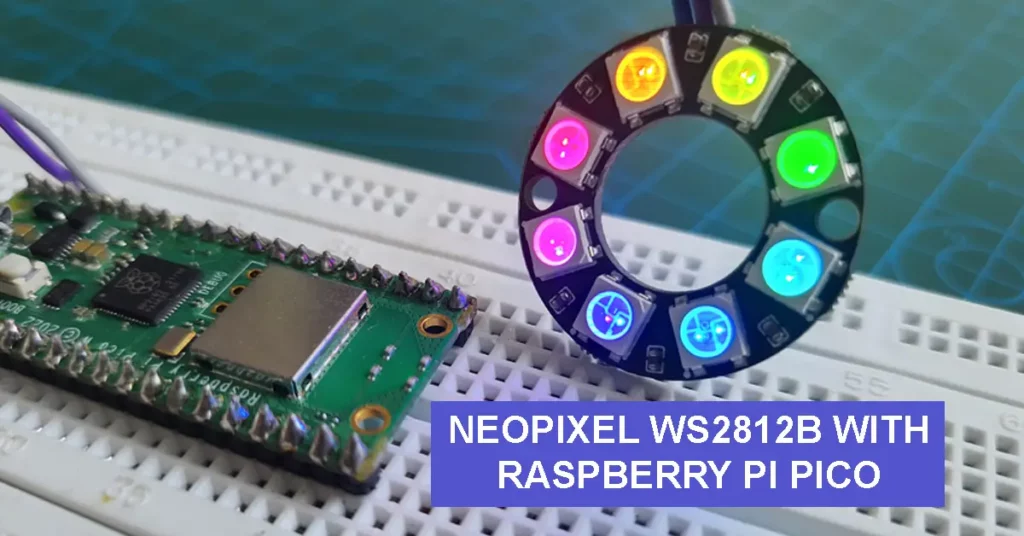
This article will guide you through all the steps required to interface a WS2812B/NeoPixel RGB LED Ring to a Raspberry Pi Pico W development board using MicroPython. This guide will also help you to light up individual NeoPixel LEDs or a WS2812B LED strip. We shall learn how the MicroPython code works and how to display various animations on the WS2812B LEDs.
Components Required
- A Raspberry Pi Pico With MicroPython Interpreter Loaded.
- A WS2812B LED Ring or Strip.
- Connecting Wires.
Overview Of WS2812 RGB LED
WS2812 and WS2812B are addressable RGB LED modules that can be daisy-chained to each other. Also popularly known as NeoPixel, which is a trademark of Adafruit Industries, the WS2812B comes in various forms such as LED strips or LED rings. WS2812B has some advantages over WS2812 such as reverse polarity protection, better heat dissipation, and more brightness.
Each WS2812B LED module contains RGB(Red, Green, and Blue) LEDs and a control circuit for the LEDs, all contained within the module. The control circuitry is responsible for receiving and processing the control signals and driving the individual color channels of the RGB LED.
WS2812B Pinout
Each WS2812B LED module contains 4 pins: VCC(5V), GND, DIN(Data In), and DOUT(Data Out). The VCC and GND pins are on one side and the DIN and GND pins are on the other.
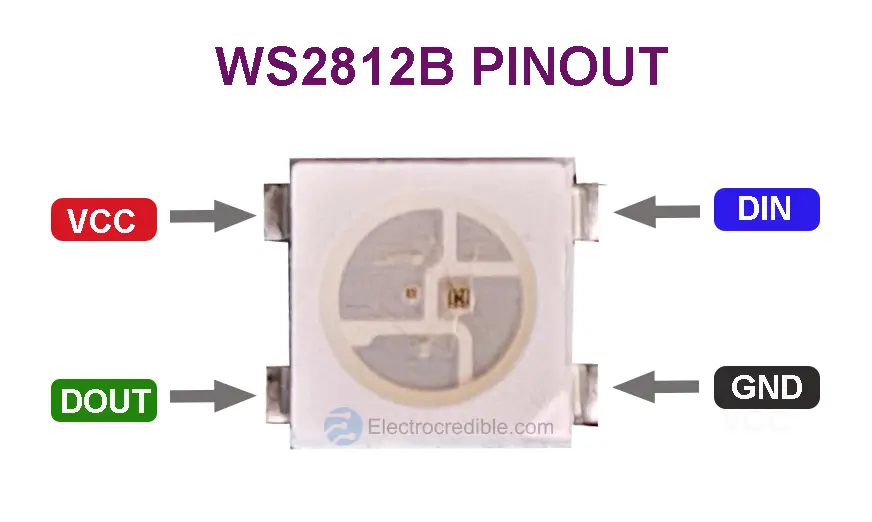
An LED module receives data from a microcontroller through the DIN pin which contains color and brightness information for the LEDs. The DOUT pin of one LED module can be connected to the DIN pin of another LED module. In this way, multiple LED modules can be chained together. Each module receives the data addressed to them.
Neopixel Ring Pinout
The image below shows the pinout on the back of a WS2812B ring containing 8 LEDs.
I soldered three wires to the solder pads (IN, VCC, OUT) of the WS2812B ring to connect it with Raspberry Pi Pico W. If There are 2 ground pads on each side but you can use any one of them.
Wiring WS2812B NeoPixel With Raspberry Pi Pico W
Connect your Raspberry Pi Pico with the NeoPixel ring as shown below. The connection will work for rings containing any number of LEDs.

The data pin of WS2812B works with the 3.3V GPIO of Raspberry Pi Pico. We do not need to shift the voltage using a logic level converter, which is generally required when we interface 3.3V devices with 5V compatible devices.
The recommended supply voltage is around 5V, as shown in the schematic above. But when I connected the VCC pin of the NeoPixel ring to 3.3V instead, it worked fine. So 3.3V can be used to power WS2812B LEDs instead of 5V. However, for long strips or larger NeoPixel rings, it is better to supply 5V to the LEDs.
You can refer to our pinout guide for Raspberry Pi Pico while making the connections.

NeoPixel MicroPython Code For Raspberry Pi Pico
Your Raspberry Pi Pico needs to be preloaded with a MicroPython UF2 file to program it using MicroPython. You can read our getting started guide for Raspberry Pi Pico where we show all steps required to start programming RP2040 in MicroPython.
If you are using macOS, follow our guide to program Raspberry Pi Pico on macOS using Thonny IDE.
Steps to upload MicroPython code for WS2812B using Thonny IDE is described below.
- With all connections done, connect the Pico to your computer using a USB cable. Open Thonny IDE, and paste the following code into a new project.
import neopixel
from machine import Pin
import time

ws_pin = 0
led_num = 8
BRIGHTNESS = 0.2  # Adjust the brightness (0.0 - 1.0)

neoRing = neopixel.NeoPixel(Pin(ws_pin), led_num)

def set_brightness(color):
    r, g, b = color
    r = int(r * BRIGHTNESS)
    g = int(g * BRIGHTNESS)
    b = int(b * BRIGHTNESS)
    return (r, g, b)

def loop():
    # Display red
    color = (255, 0, 0)  # Red color
    color = set_brightness(color)
    neoRing.fill(color)
    neoRing.write()
    time.sleep(1)

    # Display green
    color = (0, 255, 0)  # Green color
    color = set_brightness(color)
    neoRing.fill(color)
    neoRing.write()
    time.sleep(1)

    # Display blue
    color = (0, 0, 255)  # Blue color
    color = set_brightness(color)
    neoRing.fill(color)
    neoRing.write()
    time.sleep(1)

while True:
    loop()
Code language: Python (python)- Run the code by clicking the Run icon or by pressing the F5 key.

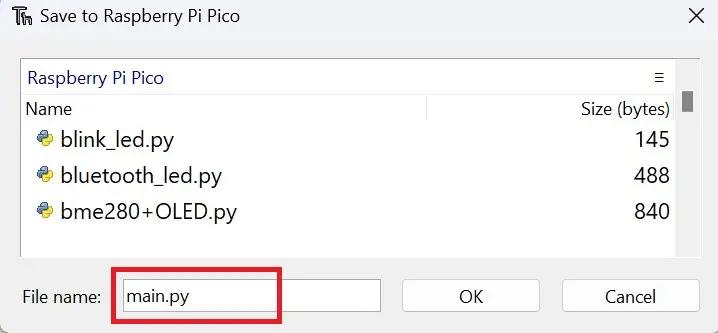
- Save the script to your Raspberry Pi Pico.

- Save the script as main.py or with any other name with a “.py” filename extension.
When you run the code, you must see the NeoPixel ring glow. All the LEDs will shine as red, green, and blue consecutively as shown in the GIF below.
NeoPixel MicroPython Code Explanation
First, we need to import the necessary modules: neopixel for controlling the WS2812 LEDs, Pin from machine module for GPIO control, and time for adding delays.
import neopixel
from machine import Pin
import timeCode language: Python (python)
A variable called ws_pin is set to 0, representing the GPIO pin connected to the data line of the WS2812 LEDs. led_num is set to 8, indicating the number of LEDs in the WS2812 ring.
ws_pin = 0
led_num = 8Code language: Python (python)
To control the brightness of the NeoPixel ring, we define a variable called BRIGHTNESS which is set to 0.2, representing the desired brightness level for the LEDs (20% brightness). For the maximum brightness of WS2812B, set this variable to 1.
BRIGHTNESS = 0.2 # Adjust the brightness (0.0 - 1.0)Code language: Python (python)Next, we create an instance of the NeoPixel class called neoRing, to control the WS2812 ring. It takes the GPIO pin (ws_pin) and the number of LEDs (led_num) as parameters.
neoRing = neopixel.NeoPixel(Pin(ws_pin), led_num)Code language: Python (python)The function set_brightness takes a color (as a tuple of RGB values) and adjusts the brightness level based on the BRIGHTNESS value. It multiplies each RGB component by the BRIGHTNESS variable, converts them to integers, and returns the adjusted color as a tuple. In Python, a tuple is a collection of objects separated by commas.
def set_brightness(color):
    r, g, b = color
    r = int(r * BRIGHTNESS)
    g = int(g * BRIGHTNESS)
    b = int(b * BRIGHTNESS)
    return (r, g, b)Code language: Python (python)
The loop function displays three colors sequentially. First, it sets color to (255, 0, 0), which represents red. Then it calls set_brightness to adjust the brightness of the color. It fills the WS2812 ring with the adjusted color using neoRing.fill(color). After that, it updates the WS2812 ring with the new colors using neoRing.write(). Then, it adds a delay of 1 second using time.sleep(1). It repeats the same process for green and blue colors.
def loop():
    # Display red
    color = (255, 0, 0)  # Red color
    color = set_brightness(color)
    neoRing.fill(color)
    neoRing.write()
    time.sleep(1)

    # Display green
    color = (0, 255, 0)  # Green color
    color = set_brightness(color)
    neoRing.fill(color)
    neoRing.write()
    time.sleep(1)

    # Display blue
    color = (0, 0, 255)  # Blue color
    color = set_brightness(color)
    neoRing.fill(color)
    neoRing.write()
    time.sleep(1)Code language: Python (python)
Finally, an infinite loop is created, and the loop function is called repeatedly to display the colors in a continuous loop.
while True:
    loop()Code language: Python (python)
MicroPython NeoPixel Examples
Let us see some more MicroPython examples to control the WS2812B LEDs on a NeoPixel ring.
Rotating Rainbow Animation
The code below creates a rainbow animation effect on the WS2812 LED ring, continuously cycling through different colors.
import neopixel  # Import the neopixel module for controlling the WS2812 LEDs
from machine import Pin  # Import the Pin module for GPIO control
import time  # Import the time module for delays

ws_pin = 0  # GPIO pin connected to the data line of the WS2812 ring
led_num = 8  # Number of LEDs in the WS2812 ring

position = 0  # Variable to keep track of the current position in the rainbow animation
brightness = 0.5  # Adjust the initial brightness (0.0 to 1.0)

neoRing = neopixel.NeoPixel(Pin(ws_pin), led_num)  # Create an instance of the NeoPixel class to control the WS2812 ring

def wheel(pos):
    # Function to generate a color based on a position in the rainbow
    if pos < 85:
        return (pos * 3, 255 - pos * 3, 0)  # Generate a red-yellow color
    elif pos < 170:
        pos -= 85
        return (255 - pos * 3, 0, pos * 3)  # Generate a yellow-green color
    else:
        pos -= 170
        return (0, pos * 3, 255 - pos * 3)  # Generate a green-blue color

def loop():
    global position, brightness  # Use global variables for position and brightness

    for i in range(led_num):
        # Iterate through each LED in the ring
        hue = int(i * (255 / led_num) + position) % 256  # Calculate the hue value based on the LED position and current position
        color = wheel(hue)  # Get the color based on the calculated hue
        color = tuple(int(val * brightness) for val in color)  # Adjust the color brightness
        neoRing[(i + position) % led_num] = color  # Set the color of the corresponding LED

    neoRing.write()  # Update the WS2812 ring with the new colors
    position = (position + 1) % led_num  # Increment the position for the next iteration
    time.sleep_ms(200)  # Delay for a short period to control the animation speed

while True:
    loop()  # Run the loop function continuously to display the rainbow animation

Code language: Python (python)
Inside the loop, it iterates through each LED in the ring and calculates a hue value based on the LED’s position and the current position. Using the wheel function, it generates a color based on the calculated hue, adjusts the brightness of the color, and sets the color of the corresponding LED in the NeoPixel ring. After updating the colors of all LEDs, it writes the updated colors to the WS2812 ring and increments the position for the next iteration. A delay of 200 milliseconds is added to control the animation speed.
You can tweak the brightness and delay values for changes in the animation.
Loading Animation (Fading Color)
The following MicroPython code displays a rotating animation where the color blue fades toward the tail of the ring.
import neopixel  # Import the neopixel library for controlling WS2812 LEDs
from machine import Pin  # Import the Pin module from the machine library for GPIO pin control
import time  # Import the time module for delays

ws_pin = 0  # GPIO pin number connected to the data input of the WS2812 ring
led_num = 8  # Number of LEDs in the WS2812 ring
position = 0  # Current position of the active LED

neoRing = neopixel.NeoPixel(Pin(ws_pin), led_num)  # Create a NeoPixel object to control the WS2812 ring

def loop():
    global position  # Declare the position variable as global to modify it inside the function

    for i in range(led_num):
        brightness = int(i * (255 / led_num)) // 2  # Calculate the brightness based on the LED index
        neoRing[(i + position) % led_num] = (0, 0, brightness)  # Set the RGB color of each LED in the ring

    neoRing.write()  # Update the LEDs with the new colors
    position = (position + 1) % led_num  # Move the active LED position by one
    time.sleep_ms(100)  # Pause for 100 milliseconds

while True:  # Loop indefinitely
    loop()  # Call the loop function repeatedly
Code language: Python (python)
NeoPixel Faint Glow
The code below lights up all the RGB LEDs inside WS2812B. The BRIGHTNESS is set to 0.01. In such a low brightness, you can easily view the LEDs and the chip inside the WS2812B module.
import neopixel  # Import the neopixel module for controlling WS2812 LEDs
from machine import Pin  # Import the Pin module from the machine library

PIN = 0  # GPIO pin number connected to the data line of the LED ring
NUM_LEDS = 8  # Total number of LEDs in the LED ring
BRIGHTNESS = 0.01  # Adjust the brightness of the LEDs (0.0 - 1.0)

neoRing = neopixel.NeoPixel(Pin(PIN), NUM_LEDS)  # Create an instance of the NeoPixel class

def set_brightness(color):
    # Adjust the brightness of the RGB values in the color tuple
    r, g, b = color
    r = int(r * BRIGHTNESS)  # Scale the red value
    g = int(g * BRIGHTNESS)  # Scale the green value
    b = int(b * BRIGHTNESS)  # Scale the blue value
    return (r, g, b)  # Return the adjusted color tuple

# Set all LEDs to a specific color
def set_all_leds(color):
    for i in range(NUM_LEDS):
        neoRing[i] = color  # Assign the color to each LED in the LED ring

def loop():
    color = (255, 255, 255)  # White color
    color = set_brightness(color)  # Adjust the brightness of the color
    set_all_leds(color)  # Set all LEDs in the LED ring to the adjusted color
    neoRing.write()  # Update the LEDs with the new color data

while True:  # Infinite loop
    loop()  # Call the loop function repeatedly to update the LED ring
Code language: Python (python)
Final Thoughts
In this article, we saw how to interface a NeoPixel ring easily with Raspberry Pi Pico W and display various animations. You can further experiment by interfacing a potentiometer to control the brightness of the LEDs.
If you would like to make your LED projects portable, you can view our tutorial on powering Raspberry Pi Pico with batteries.
Here are some other Raspberry Pi Pico display projects:
Leave a Reply