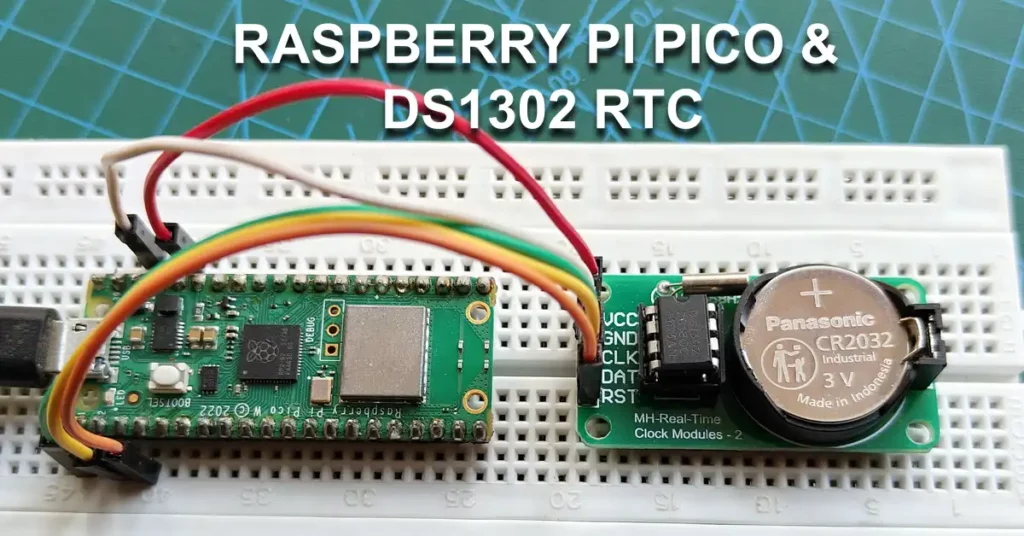
This tutorial will guide you to interface the DS1302 RTC with Raspberry Pi Pico W using MicroPython code.
A real-time clock or RTC is an integrated circuit that can keep time. It consumes very little power and can run for years on a coin battery. RTCs are an important part of everyday electronics and help to keep time even after a device is powered down.
The RP2040 microcontroller that powers Raspberry Pi Pico features an inbuilt RTC. However, the development board does have the feature to power the RTC without powering the board.
The inbuilt RTC resets on reboot and requires to be constantly powered to keep time. As Raspberry Pi Pico boards consume a few milliAmperes of current, it becomes impractical to use the inbuilt RTC in battery-powered projects.
Related: How to Power Raspberry Pi Pico with Batteries – Li-ion, 9V, 12V, AA, AAA Examples
Prerequisites
Components Required
- Raspberry Pi Pico or Pico W
- DS1302 RTC module
- Breadboard and connecting wires
Software Setup
Your Raspberry Pi Pico must be preloaded with a MicroPython UF2 file to program it in MicroPython. You can read our getting started guide for Raspberry Pi Pico where we show all the steps required to start programming Raspberry Pi Pico & Pico W.
The DS1302 RTC
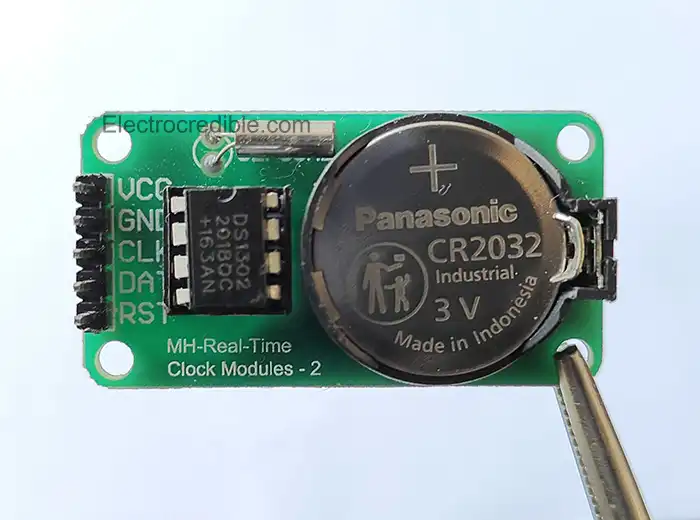
The DS1302 is a trickle charge timekeeping chip that counts minutes, hours, dates, months, days of the week, and year with lead leap-year compensation valid up to 2100. It is available in an 8-pin DIP package.
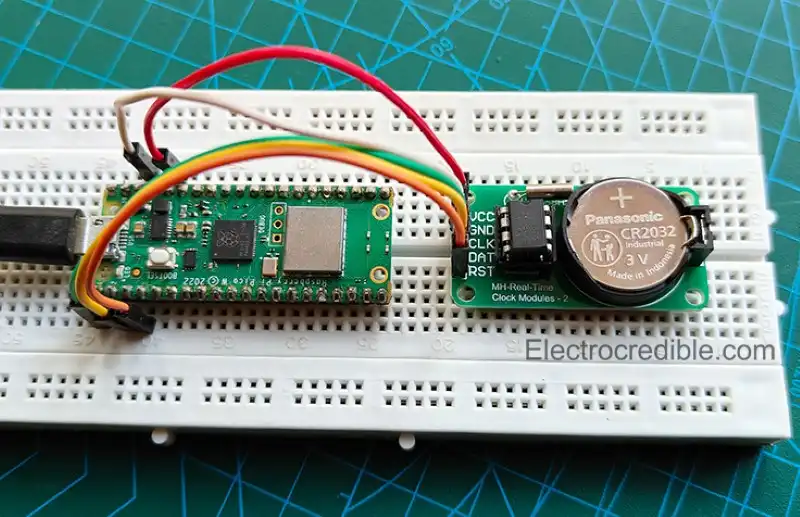
The chip requires an external 32.768kHz quartz crystal oscillator and a coin battery(CR2032). It is commonly available as a breakout board module, as shown below.
DS1302 Features
| Operating Voltage- | 2V-5.5V |
| Current consumption- | Less than 300nA at 2V |
| Internal memory- | 31 x 8 bytes static RAM(battery-backed) |
Schematic: Raspberry Pi Pico W with DS1302 RTC
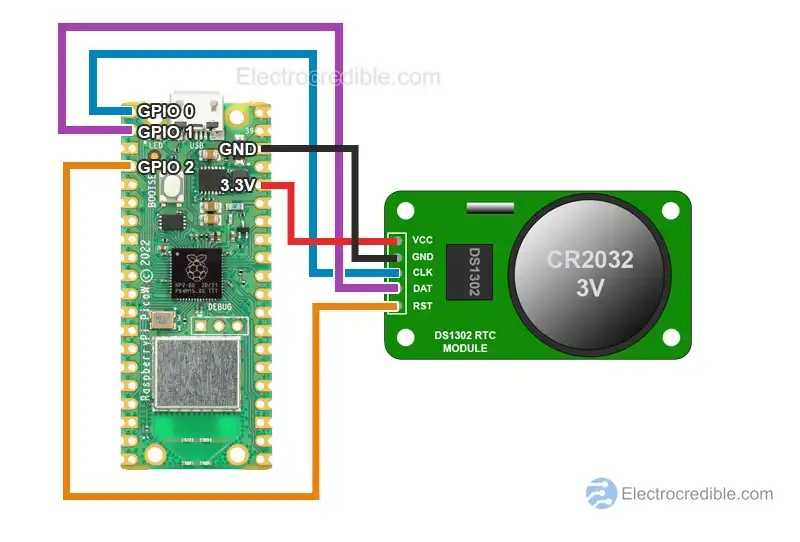
Connect Raspberry Pi Pico W to DS1302 as shown in the schematic above. You can use any of the ground pins in Pico. You can also use other GPIOs. Learn more about the GPIOs in our article – Raspberry Pi Pico & Pico W Pinout Guide.

DS1302 RTC MicroPython Library
To interface the DS1302 RTC, we shall use a MicroPython library or driver. The library is hosted in this Github link.
Here is the procedure to save the library using Thonny IDE.
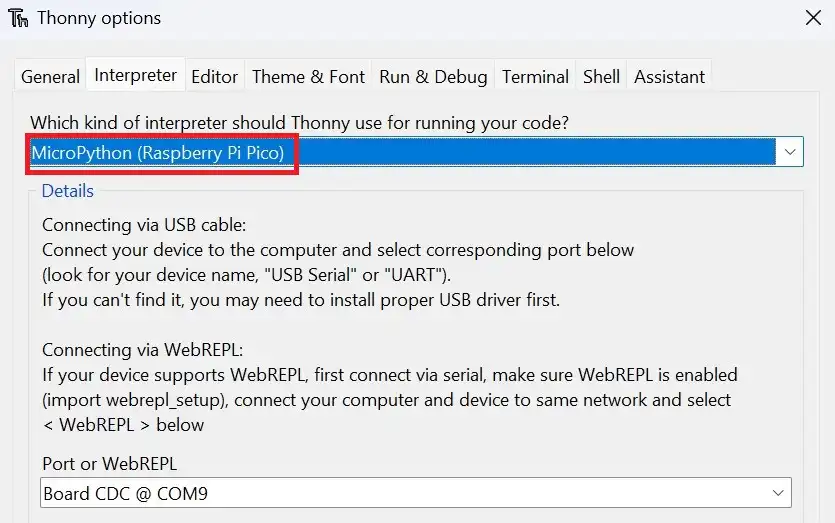
1. Connect Raspberry Pi Pico to your computer using a USB cable. Open Thonny IDE and set the interpreter to use MicroPython on Raspberry Pi Pico.
2. Go to File>New in Thonny IDE to create a new project.
3. Paste the following code into the new project.
from machine import Pin

DS1302_REG_SECOND = (0x80)
DS1302_REG_MINUTE = (0x82)
DS1302_REG_HOUR   = (0x84)
DS1302_REG_DAY    = (0x86)
DS1302_REG_MONTH  = (0x88)
DS1302_REG_WEEKDAY= (0x8A)
DS1302_REG_YEAR   = (0x8C)
DS1302_REG_WP     = (0x8E)
DS1302_REG_CTRL   = (0x90)
DS1302_REG_RAM    = (0xC0)

class DS1302:
    def __init__(self, clk, dio, cs):
        self.clk = clk
        self.dio = dio
        self.cs = cs
        self.clk.init(Pin.OUT)
        self.cs.init(Pin.OUT)

    def _dec2hex(self, dat):
        return (dat//10) * 16 + (dat % 10)

    def _hex2dec(self, dat):
        return (dat//16) * 10 + (dat % 16)

    def _write_byte(self, dat):
        self.dio.init(Pin.OUT)
        for i in range(8):
            self.dio.value((dat >> i) & 1)
            self.clk.value(1)
            self.clk.value(0)

    def _read_byte(self):
        d = 0
        self.dio.init(Pin.IN)
        for i in range(8):
            d = d | (self.dio.value() << i)
            self.clk.value(1)
            self.clk.value(0)
        return d

    def _get_reg(self, reg):
        self.cs.value(1)
        self._write_byte(reg)
        t = self._read_byte()
        self.cs.value(0)
        return t

    def _set_reg(self, reg, dat):
        self.cs.value(1)
        self._write_byte(reg)
        self._write_byte(dat)
        self.cs.value(0)

    def _wr(self, reg, dat):
        self._set_reg(DS1302_REG_WP, 0)
        self._set_reg(reg, dat)
        self._set_reg(DS1302_REG_WP, 0x80)

    def start(self):
        t = self._get_reg(DS1302_REG_SECOND + 1)
        self._wr(DS1302_REG_SECOND, t & 0x7f)

    def stop(self):
        t = self._get_reg(DS1302_REG_SECOND + 1)
        self._wr(DS1302_REG_SECOND, t | 0x80)

    def second(self, second=None):
        if second == None:
            return self._hex2dec(self._get_reg(DS1302_REG_SECOND+1)) % 60
        else:
            self._wr(DS1302_REG_SECOND, self._dec2hex(second % 60))

    def minute(self, minute=None):
        if minute == None:
            return self._hex2dec(self._get_reg(DS1302_REG_MINUTE+1))
        else:
            self._wr(DS1302_REG_MINUTE, self._dec2hex(minute % 60))

    def hour(self, hour=None):
        if hour == None:
            return self._hex2dec(self._get_reg(DS1302_REG_HOUR+1))
        else:
            self._wr(DS1302_REG_HOUR, self._dec2hex(hour % 24))

    def weekday(self, weekday=None):
        if weekday == None:
            return self._hex2dec(self._get_reg(DS1302_REG_WEEKDAY+1))
        else:
            self._wr(DS1302_REG_WEEKDAY, self._dec2hex(weekday % 8))

    def day(self, day=None):
        if day == None:
            return self._hex2dec(self._get_reg(DS1302_REG_DAY+1))
        else:
            self._wr(DS1302_REG_DAY, self._dec2hex(day % 32))

    def month(self, month=None):
        if month == None:
            return self._hex2dec(self._get_reg(DS1302_REG_MONTH+1))
        else:
            self._wr(DS1302_REG_MONTH, self._dec2hex(month % 13))

    def year(self, year=None):
        if year == None:
            return self._hex2dec(self._get_reg(DS1302_REG_YEAR+1)) + 2000
        else:
            self._wr(DS1302_REG_YEAR, self._dec2hex(year % 100))

    def date_time(self, dat=None):
        if dat == None:
            return [self.year(), self.month(), self.day(), self.weekday(), self.hour(), self.minute(), self.second()]
        else:
            self.year(dat[0])
            self.month(dat[1])
            self.day(dat[2])
            self.weekday(dat[3])
            self.hour(dat[4])
            self.minute(dat[5])
            self.second(dat[6])

    def ram(self, reg, dat=None):
        if dat == None:
            return self._get_reg(DS1302_REG_RAM + 1 + (reg % 31)*2)
        else:
            self._wr(DS1302_REG_RAM + (reg % 31)*2, dat)
Code language: Python (python)
4. Click on File>Save as and select the save location as Raspberry Pi Pico.

5. Set the filename as ds1302.py.
MicroPython Code to Interface DS1302 RTC with Raspberry Pi Pico
With the library for DS1302 installed, we can now upload MicroPython code to read/write DS1302 using Raspberry Pi Pico W.
Code for two operations shall be explained:
- Initially, set the year, month, day, hour, minute, and seconds in the static RAM of DS1302.
- Retrieve the data from the RTC that was saved in the step above.
Set RTC
The following MicroPython code will write data to RTC:
# Import necessary modules
from machine import Pin
import ds1302

# Initialize DS1302 RTC with specified pins (clk, dio, cs)
ds = ds1302.DS1302(Pin(0),Pin(1),Pin(2))

# Set the date and time on the RTC
ds.year(2085)  # Set the year to 2085
ds.month(1)    # Set the month to January
ds.day(17)     # Set the day to 17th
ds.hour(00)    # Set the hour to midnight (00)
ds.minute(17)  # Set the minute to 17
ds.second(30)  # Set the second to 30

# Print the date and time
print( "Date={}/{}/{}" .format(ds.month(), ds.day(),ds.year()) )
print( "Time={}:{}:{}" .format(ds.hour(), ds.minute(),ds.second()) )
Code language: Python (python)
Change ds.year(2085) to the year you want to set. Follow similar logic for the next lines to set the month, day, etc.
Save the code to Raspberry Pi Pico. Name the file as main.py or any other name with a ‘.py’ filename extension.
Run the code by clicking on the Run icon or press F5.

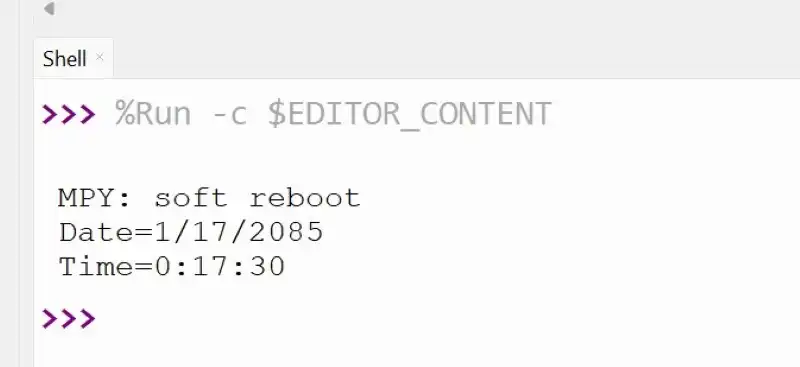
When the code runs, the shell of the IDE will print the date in MM-DD-YYYY format and the time in HH:MM:SS. It should match the date and time that you specified in the code.
Read RTC
Read the DS1302 RTC using the following MicroPython code. The code is similar to the code used to set the RTC, with a few lines removed.
from machine import Pin
import ds1302

ds = ds1302.DS1302(Pin(0),Pin(1),Pin(2)) #(clk, dio, cs)

print( "Date={}/{}/{}" .format(ds.month(), ds.day(),ds.year()) )
print( "Time={}:{}:{}" .format(ds.hour(), ds.minute(),ds.second()) )Code language: Python (python)
Save the code to Raspberry Pi Pico. Name the file as main.py or any other name with a ‘.py’ filename extension.
Run the code. You should see the output data in the shell of Thonny IDE similar to the screenshot shown in the earlier section.
MicroPython Functions for DS1302 RTC
Here are some additional MicroPythons functions for the DS1302 RTC, assuming that the ds object has been created for the DS1302 class.
ds.start(): start the RTC.ds.stop(): stop or pause the RTC.ds.date_time(): Gets or sets the date and time. If no parameters are given, it will return the current date and time, otherwise, it will set the DateTime.
DateTime format: [Year, month, day, weekday, hour, minute, second].ds.ram(): Get / set ram data (31 bytes).
Demonstration
The DS1302 RTC will store the data as long as it is powered. If you do not have battery power, the RTC will store data till it is powered externally using Raspberry Pi Pico’s 3.3V power output pin.
When power is removed, the date resets to 1/1/2000 and the time resets to 00:00:00.
Conclusion
This Raspberry Pi Pico RTC interfacing guide used MicroPython code to set and read the DS1302 RTC. You can use the information here to make a clock using LCD, OLED, or 7-segment displays.
ⓘ DS2321 is a more accurate RTC alternative to DS1302. Read our article: Interface DS3231 With Raspberry Pi Pico-MicroPython/Arduino Code.
These guides will help you to make a digital clock by combining RTC with a display:
Leave a Reply