This tutorial will help you to get started with programming ESP32 using MicroPython. We will learn about how to flash the MicroPython UF2 and upload code to the ESP32 development board. uPyCraft IDE will be used to first install a MicroPython environment on ESP32, and then we will upload code using the same IDE.
The steps here are explained using Windows OS and ESP-WROOM-32 development board. At the end of this tutorial, you will be able to blink an LED using MicroPython script.
If you want to use Thonny IDE, follow our guide:
Brief Introduction to MicroPython
MicroPython is a port of Python 3 that is specifically designed to work with low-power microcontrollers. It features a subset of the standard Python library and is optimized to run on bare metal processors. Although MicroPython is not a full implementation of Python, its syntax and features share many similarities.
Once we upload a MicroPython script to a microcontroller, the MicroPython runtime environment, which is a tiny software that runs on the microcontroller’s CPU, interprets the code. The code will be then executed by the MicroPython runtime environment, which also controls memory allocation and grants access to the hardware capabilities of the microcontroller. On the other hand, code like C/C++ is not interpreted but compiled.

Also read: Arduino vs MicroPython vs CircuitPython: Which One Will You Choose?
MicroPython has a built-in filesystem and allows us to execute commands via a USB port. We get an interactive prompt called the REPL to interact with the microcontroller. More on the REPL is discussed later in this guide.
Many manufacturers release development boards that can run MicroPython. Since running MicroPython is resource-intensive, it is not used with older boards such as the Arduino UNO. Raspberry Pi Pico W and ESP32 are well suited to run MicroPython. You can look at our article that discusses the best MicroPython boards you can use.
Requirements
- uPyCraft IDE- To flash MicroPython and upload code. Its installation and usage are explained here.
- ESP32 Development Board- I shall be using an ESP-WROOM-32 throughout this tutorial. You can choose any other variant you have.
- A USB cable and a computer running Windows OS.
Installation Of uPyCraft IDE
Thonny IDE and uPyCraft IDE are popular IDEs used for programming microcontrollers with MicroPython. The uPyCraft IDE can easily flash a MicroPython file that will act as a compiler and MicroPython runtime in ESP32.
So, let us first see how we can easily install uPyCrfat IDE.
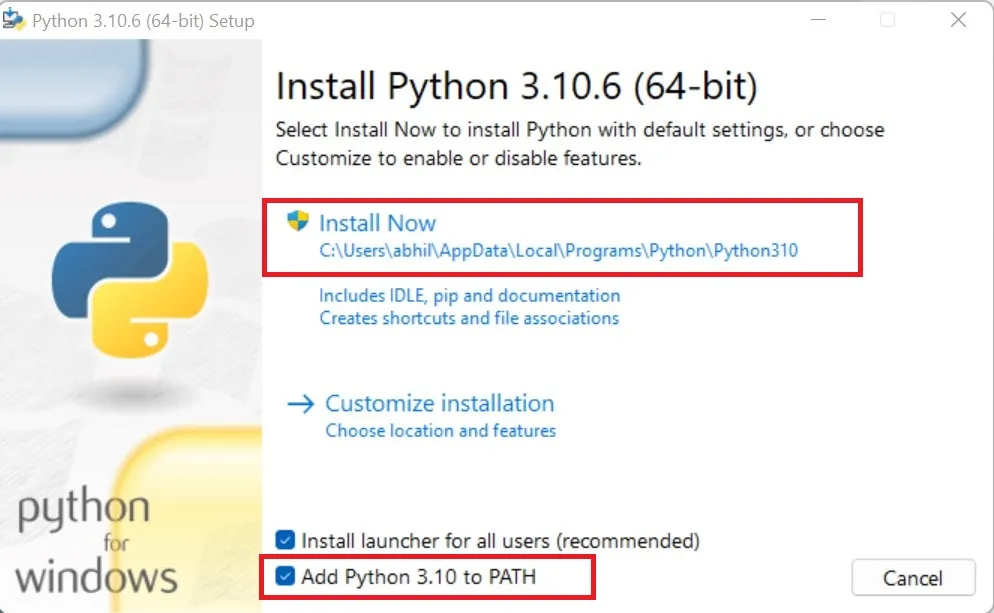
- First, we need to have Python installed on our computer. If you don’t have it already, you can get the latest version by visiting https://www.python.org/downloads/. Download the latest version for your operating system.
- Open the Python installation file. Make sure to tick “Add Python to path“. Then click Install Now.
- After Python successfully installs, we can install the uPyCraft IDE. You can find the IDE installation file by visiting https://github.com/DFRobot/uPyCraft. Download one of the latest versions for your OS. You can also download the IDE from this Google Drive link of version 1.1 of the IDE that I have shared for public access.
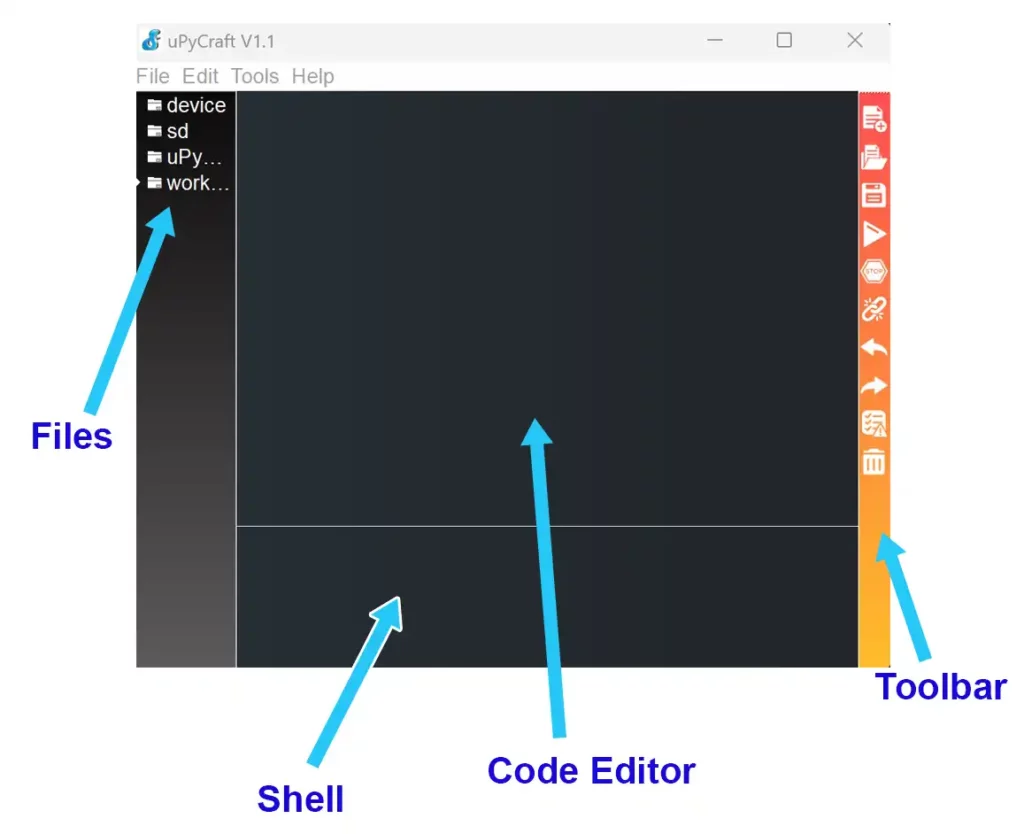
- Opening uPyCraft IDE will present a window that is described in the image below.

Flashing MicroPython On ESP32 Using uPyCraft IDE
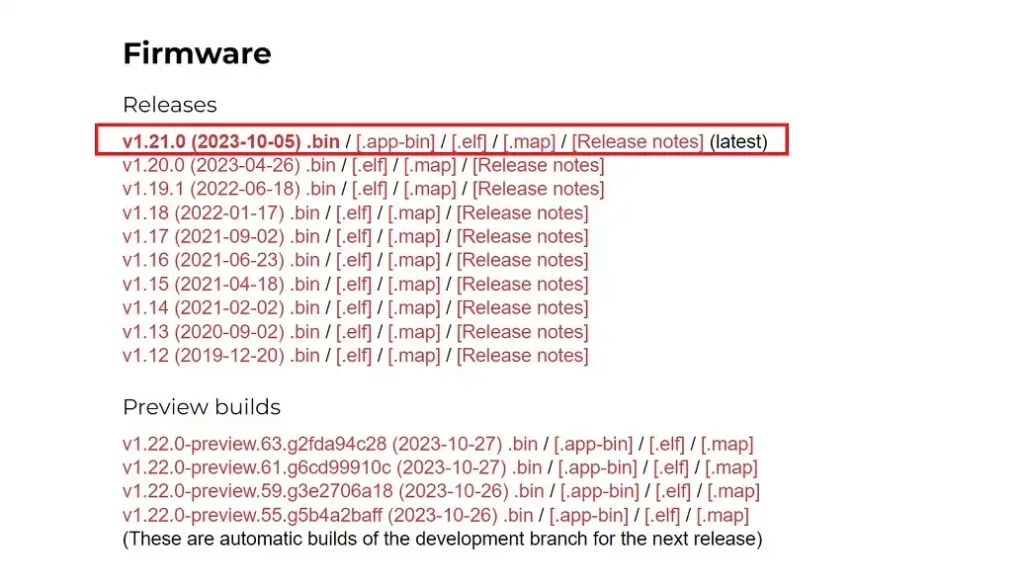
To run MicroPython code on ESP32, we need to upload a special file with a ‘.bin‘ extension to ESP32. This file will be responsible for compiling the MicroPython code to bytecode and features the runtime interpreter to run the bytecode.
Visit the link https://micropython.org/download/ESP32_GENERIC/ and download one of the latest builds for your board. The screenshot below shows the .bin file I downloaded for my ESP-WROOM-32 board.
Now, the downloaded .bin file has to be uploaded to ESP32 before we can run MicroPython code on it. Follow these steps:
- Connect your ESP32 to your computer using a USB cable.
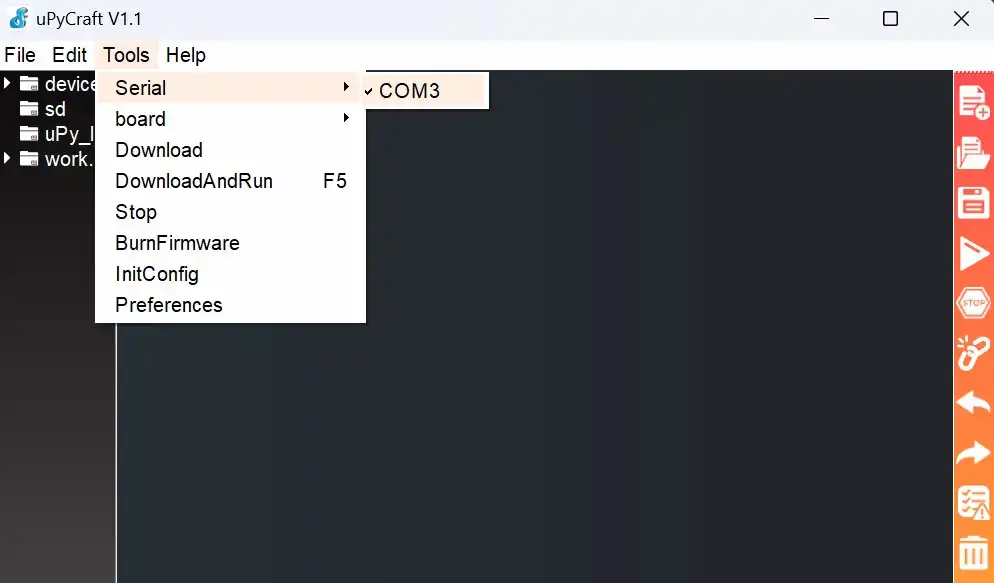
- Open uPyCraft IDE, click on Tools>Serial, and select the COM port shown. If the COM port is not visible, refer to the troubleshooting section below in this article. COM3 was shown in my case, but it may vary.
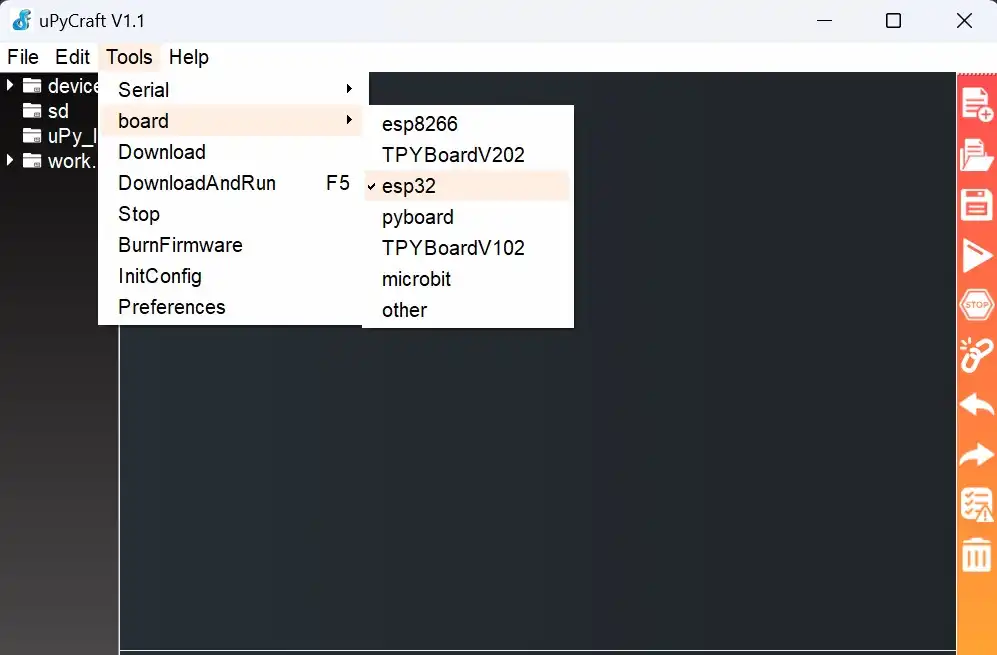
- Go to Tools>board and select esp32.
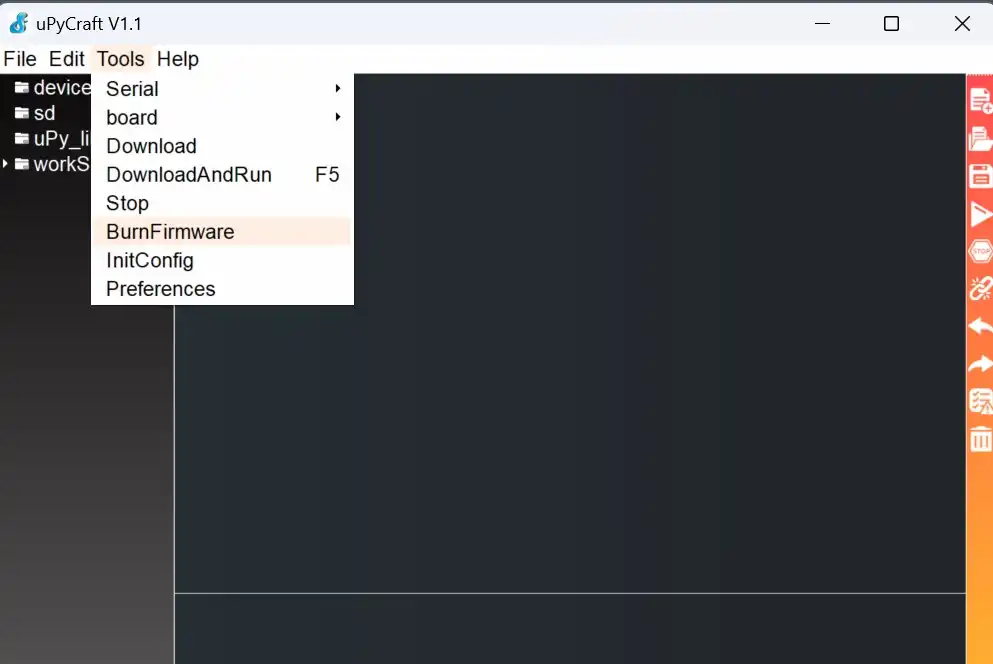
- Click on Tools>BurnFirmware.
- On the next window that appears, select the option button next to Users. Then click choose and browse to the .bin that you downloaded earlier. Set burn_addr to 0x1000, and erase_flash to yes. Refer to the image below. Click on the ok button when done.

- Note that for some variants of ESP32, you might need to press and hold the ‘BOOT/FLASH’ button while flashing firmware. However, I did not need to do so on my ESP-WROOM-32 board.
- Wait for the flashing process to complete. The progress window will automatically close when the flashing is completed.

Testing MicroPython REPL in uPyCraft IDE
If we power up an ESP32 with MicroPython installed on it, it waits for user commands to perform an action. The fastest way to interact with it is through REPL.
REPL stands for read-evaluate-print loop. In the read phase, MicroPython waits for code to be written on the shell of an IDE. Upon pressing the Enter key, Micropython evaluates the code that was typed and runs it immediately. If any result is to be shown, it is printed for the user to view. This process continues in a loop, i.e. it again goes back to the read phase and waits for the next line of code to be written.
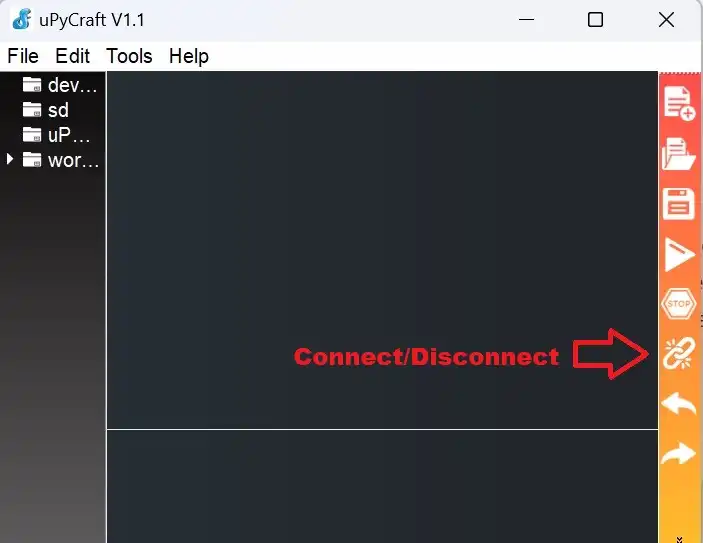
After the flashing process of the MicroPython .bin file is completed, click the ‘connect’ icon in the side toolbar of uPyCraft IDE.
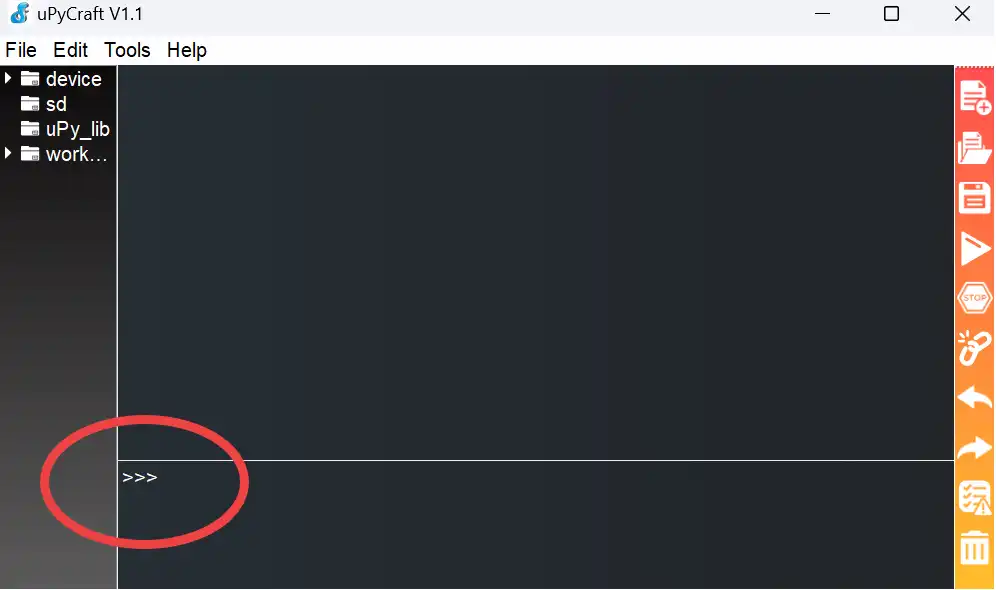
The symbol >>> should appear in the shell of uPyCrfat IDE, meaning that the connection has been successfully established with ESP32 and the REPL is ready to accept commands.
To test the REPL, type print('Hello world') in the shell of uPyCraft. “Hello world” should be printed in the next line if the MicroPython setup is successful.

MicroPython Script example -Blink Onboard LED of ESP32
Now that we have verified the MicroPython REPL works onboard the ESP32, let us proceed to write a simple MicroPython script and upload it to ESP32. The script will blink the LED onboard the ESP32 development board.
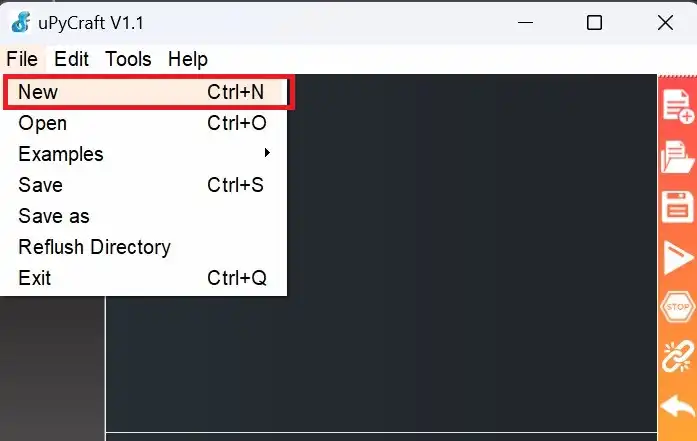
On uPyCraft IDE, click on File>New or press Ctrl+ N on your keyboard to open a new file.
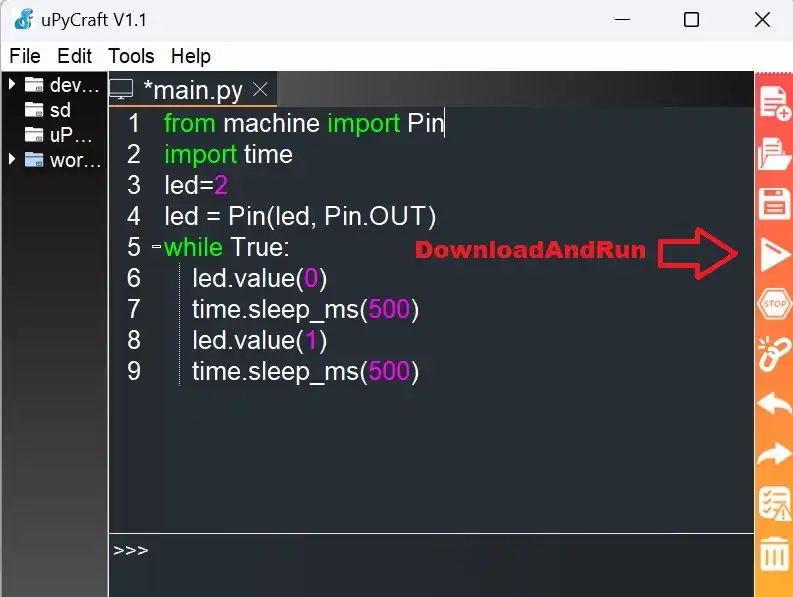
Find the pin number for the onboard LED on the ESP32 board you are using. ESP-WROOM-32 board that I used has pin 2 connected to the onboard LED. Copy and paste the following code in the code editor space. You might need to change the line led_pin=2 depending on your board.
from machine import Pin
import time
led_pin=2
led = Pin(led_pin, Pin.OUT)
while True:
    led.value(0)
    time.sleep_ms(500)
    led.value(1)
    time.sleep_ms(500)Code language: JavaScript (javascript)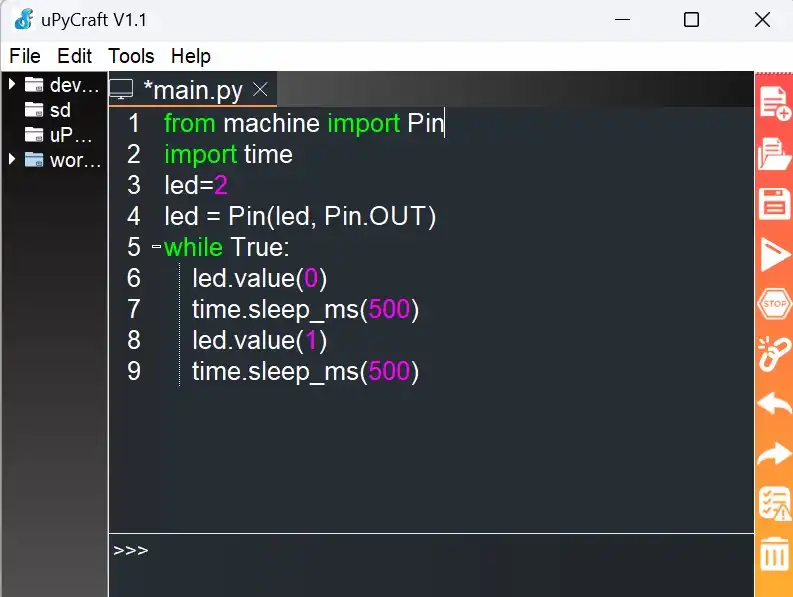
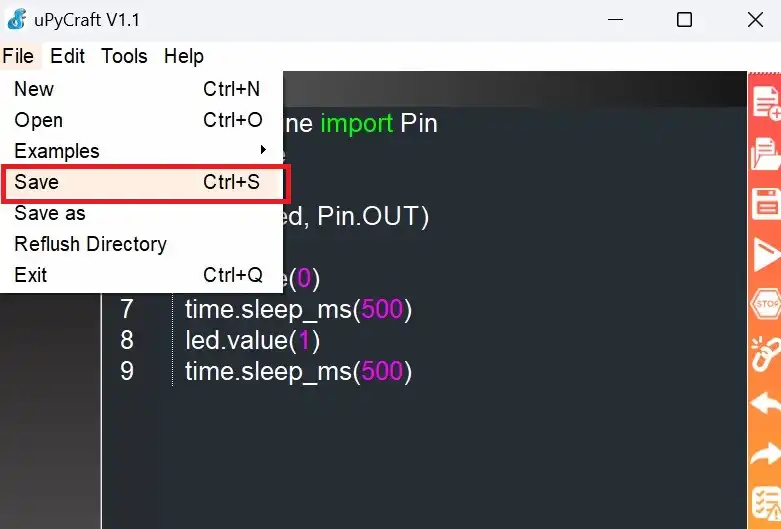
Next, click File>Save or Ctrl+S to save the code.
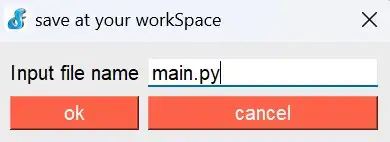
Set the file name as “main.py” and press ok
Press the DownloadAndRun button to run your MicroPython code.
The shell in uPyCraft IDE will print an output when the code successfully runs as shown in the screenshot below.

The LED onboard your ESP32 development board must now start blinking.
Code Explanation
First, import the necessary MicroPython. Import the Pin class from the machine module, which is used for hardware control. Import the time module for time-related functions.
from machine import Pin
import timeCode language: JavaScript (javascript)
Define the pin number (led_pin) where the LED is connected. In this case, it’s set to pin 2, as ESP-WROOM-32 board has GPIO 2 connected to the onboard LED. Your ESP32 board may have a different pin connected to the LED. Look for the pinout of your ESP32 model using a web search and change this line if required.
led_pin=2Create a Pin object named led and configure it as an output pin using Pin.OUT. This object will be used to control the LED.
led = Pin(led_pin, Pin.OUT)Enter an infinite loop using while True:. This ensures that the following code will run continuously until manually stopped or interrupted.
while True:Code language: PHP (php)Inside the loop, the LED is turned OFF by setting the pin’s value to 0.
led.value(0)Code language: CSS (css)A delay of 500 milliseconds is introduced using. This keeps the LED in the OFF state for 0.5 seconds.
time.sleep_ms(500)Code language: CSS (css)The LED is then turned ON by setting the pin’s value to 1. Another delay of 500 milliseconds is introduced, keeping the LED in the ON state for 0.5 seconds.
    led.value(1)
    time.sleep_ms(500)Code language: CSS (css)
The code essentially creates a simple LED blinker that alternates between turning the LED on and off with a 1-second (500 ms on, 500 ms off) cycle. This process repeats indefinitely within the while True: loop, creating a continuous blinking effect.
Troubleshooting
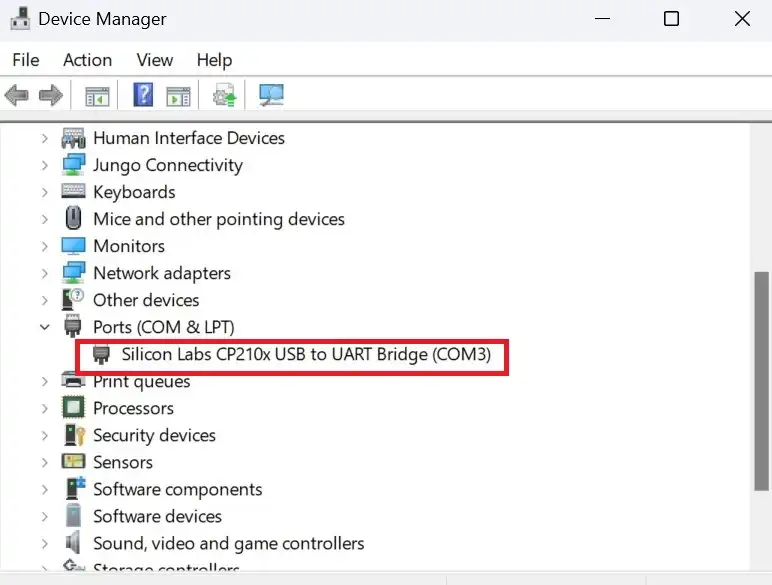
If the COM port is not visible in the uPCraft IDE then the proper driver for the USB communication chip onboard ESP32 module might be missing. To verify that the drivers are properly installed:
- After connecting your ESP32 to the computer via a USB cable, go to Device Manager and expand the PORTS section. As I have the proper drivers, Silicon Labs CP210x USB to UART Bridge (COM3) is being shown.
- If no such device is visible under the PORTS section, then you will have to manually install the correct drivers.
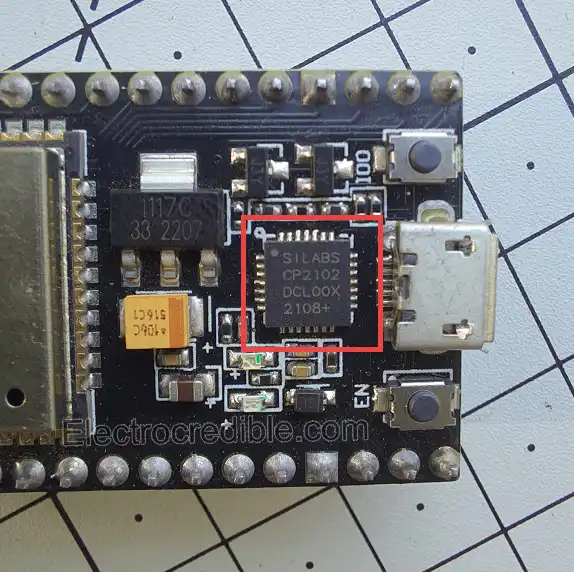
- First, find out the chip responsible for USB communication on your development board. It is often located near the USB port.
- In the ESP-WROOM-32 board I used, the Silicon Labs CP2102 chip is used as shown in the photo below. Some ESP32 boards also use the CH340 chip.
- Find the driver required by searching the web for “chip name + driver”. Alternatively, you can follow this guide to install CH340 chip drivers or visit the Silabs website to download the driver for the CP210X chip.
- After installing the correct driver, go to Device Manager and verify that the driver is visible under the PORTS section. Now upon restarting your IDE, the COM port must be visible.
- If this method fails, ensure the USB cable is working properly. Some USB cables are only meant for charging devices while others can carry data too. You will need a USB data cable for communicating with ESP32.
Conclusion
We hope you found this guide useful to get you started with using MicroPython on ESP32. You can take a look at our other MicroPython articles for more experimentation. Thank you for reading.
Also Read: Getting Started with MicroPython on Raspberry Pi Pico & Pico W
Leave a Reply