In this guide, you will learn how to soft reset and factory reset your Raspberry Pi Pico and Pico W. Soft reset is similar to restarting or rebooting the RPi Pico board. Hard reset or factory reset will wipe all the files and data in Raspberry Pi Pico.
If your Raspberry Pi Pico has stopped executing your program, you are unable to communicate via USB, or the MicroPython REPL is not working, then the solutions provided in this tutorial will be helpful to you.
Here, we explain different ways in which you can reset Raspberry Pi Pico:
- Soft reset using a pushbutton.
- Reset using MicroPython REPL.
- Factory Reset by erasing the Flash memory.
- Reset a stuck Pico by renaming the main.py file.
Method 1: Reset Raspberry Pi Pico using Pushbutton
The onboard pushbutton in Raspberry Pi Pico named “BOOTSEL” does not reset the board. It is only used while loading firmware into it.
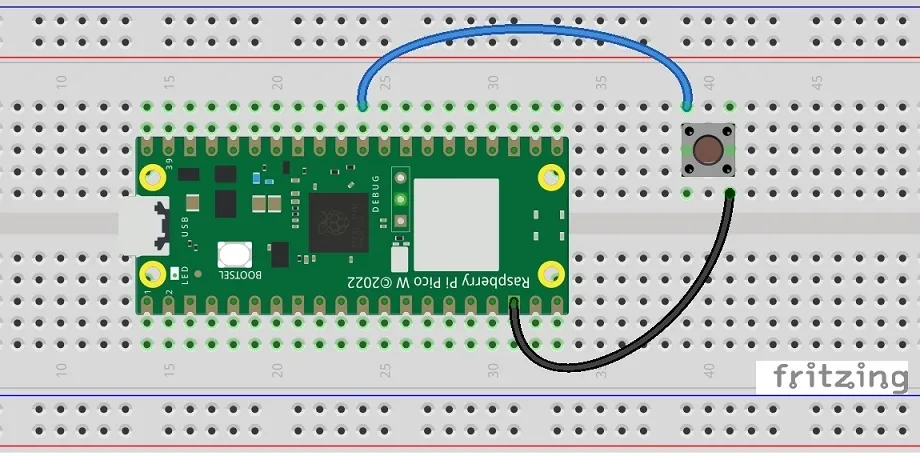
Connecting a push-button between the RUN pin and any of the GND pins will let us soft reset Raspberry Pi Pico easily. The RUN pin is the 30th pin in both Raspberry Pi Pico and Pico W. This pin has an internal pull-up resistor of around 50kΩ that prevents this pin from floating.
For reference, you can see the RUN pin in the pinout:
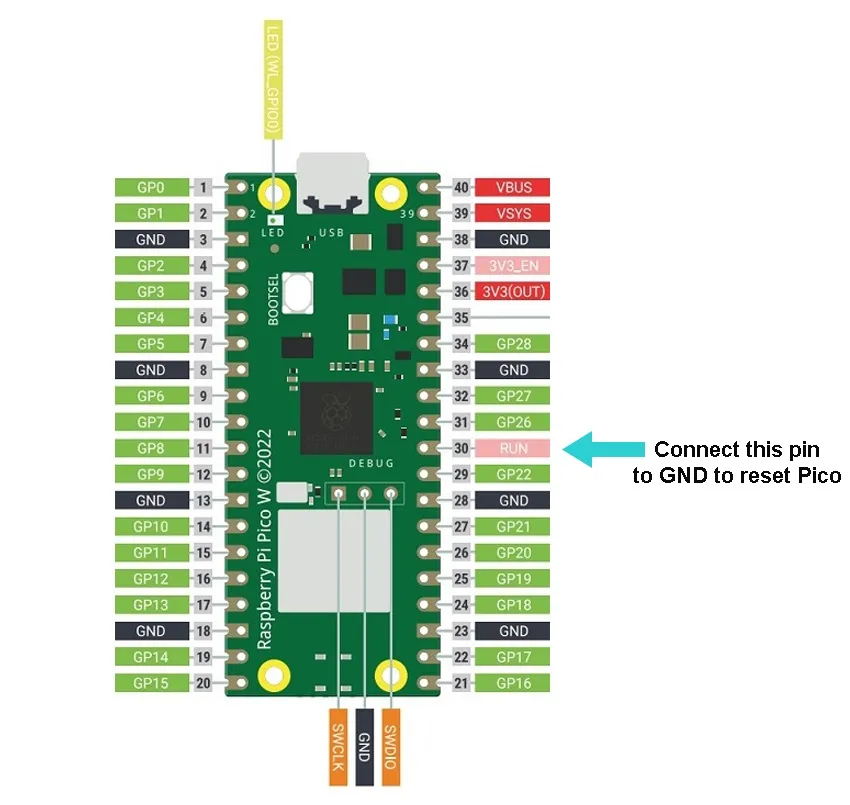
Connect a push-button between pin 30 (RUN) and pin 28 (GND) as shown in the schematic below.
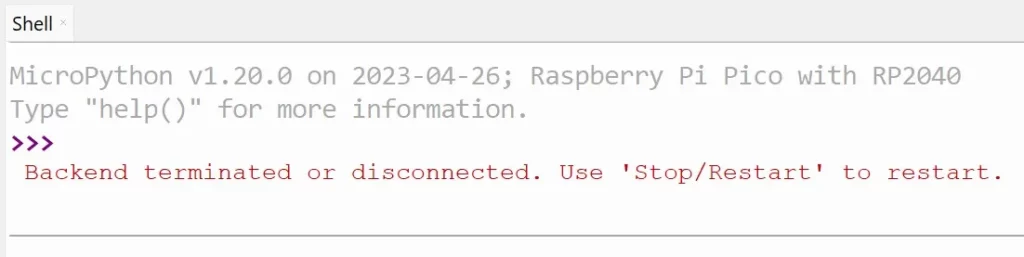
When we press the push button, the RPi Pico board will reset. If a main.py program is stored in the board, the program will start executing from the start. If the board was connected to the computer while being reset, Thonny IDE shows the following message in the shell:
For any future projects, you can connect this pushbutton to make it easier for you to reset the Pico W board. This saves you from the hassle of reconnecting and disconnecting the USB cable every time you need to reboot Pico. If you do not have a pushbutton, you can simply connect a jumper-wire/ DuPont-wire between the RUN pin and a GND pin to reset your Pico.
Method 2: Soft Reset using MicroPython REPL
Resetting using the MicroPython REPL is fairly easy with a single line of MicroPython code:
machine.reset()Code language: CSS (css)This code will soft reset Raspberry Pi Pico. Use this code in your scripts to reset the MicroPython runtime. The shell will also display the message “MPY: soft reboot” once the reboot is successful.
Method 3: Factory Reset Raspberry Pi Pico & Pico W
In the MicroPython environment, if you have the files boot.py and main.py saved into your RPi Pico, the boot.py script will run first on startup, followed by main.py. Depending on your code, you might not be able to access the REPL over an IDE like Thonny. In such a condition, you can attempt to factory reset your RPi Pico board.
Factory reset or hard reset is the process of restoring a device to its original system state. When we perform a factory reset on Pico, all the internal files and data will be deleted. The onboard flash memory will be erased entirely.
There is a special UF2 file, called flash_nuke.uf2, that can be loaded into the Pico board to wipe its flash memory. This file will wipe both Raspberry Pi Pico & Pico W.
Steps to Factory Reset Raspberry Pi Pico
- Download the flash_nuke.uf2 file to your computer.
- Press the BOOTSEL button on Pico and while keeping it pressed, connect it to your computer via a USB cable. The Pico should now appear as a mass storage device on your computer with the label RPI-RP2.
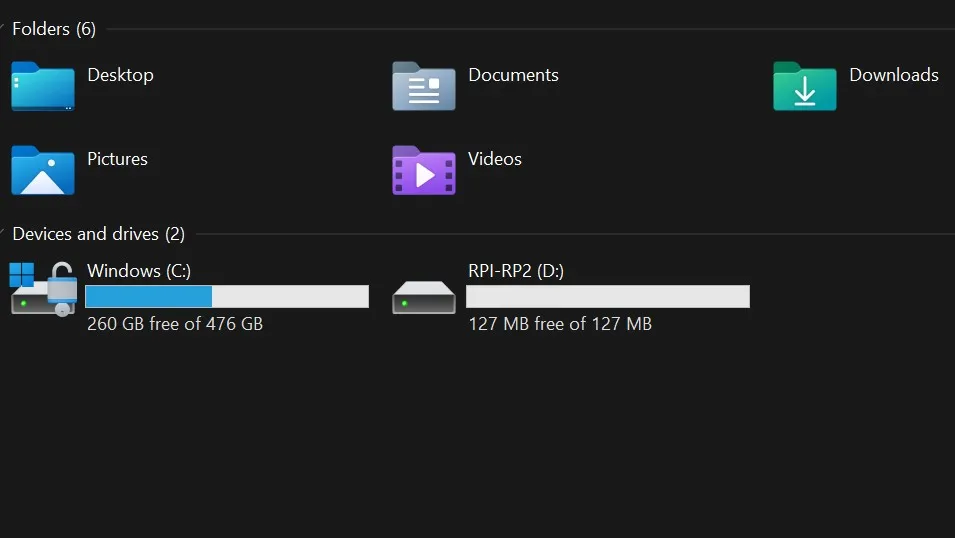
- Copy and paste the flash_nuke.uf2 file into this new drive. Your Pico/Pico W will now restart and all the files in its Flash memory will be erased.
Usage After Factory Reset
Raspberry Pi Pico’s documentation mentions – “BOOTSEL mode lives in read-only memory inside the RP2040 chip, and it can’t be overwritten accidentally. There is no way to brick the board through software.” So you do not need to worry if formatting the Flash memory will damage or brick your Pico.
If you wish to program your Pico using MicroPython again, you will need to re-flash the MicroPython UF2 file by visiting the link https://micropython.org/download and selecting the appropriate UF2 file for your board. You can follow the steps in our getting started guide for RPi Pico, which will help you to start using MicroPython with Pico again.
You can also program your board using Arduino IDE.

Method 4: Reset By Renaming Main.py
If you do not wish to lose all the files in your Pico as shown in the factory reset method, you can try to rename the main.py file. Sometimes, your Pico may be stuck due to the main.py script. A particular UF2 file will help you to rename the main.py file.
Download the MicroPython_RenameMainDotPy.uf2.zip and extract the UF2 file to your computer.
Like the steps described earlier, connect Pico to the computer while pressing the BOOTSEL button. Paste the MicroPython_RenameMainDotPy.uf2 file into Pico. You Pico will reboot thereafter.
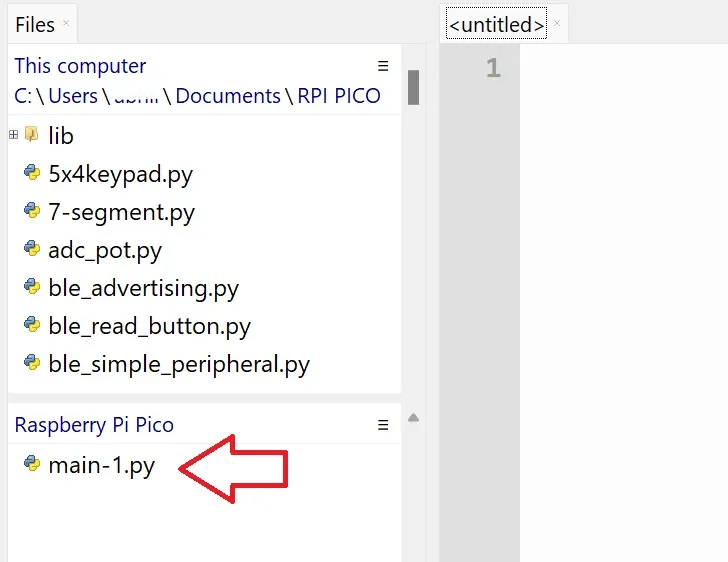
The main.py in Pico will be renamed to main-1.py. The image below shows the renamed main.py file in Thonny IDE’s file explorer.
If the main.py was causing your Pico to get stuck, this solution would allow you to access the Pi Pico over REPL again. But if this method fails, then follow the instructions in Method 3 to erase the flash memory of Pi Pico entirely.
Also read: Raspberry Pi Pico & Pico W Pinout Guide – All Pins Explained
Leave a Reply