This article will guide you to interface a K-Type Thermocouple with Raspberry Pi Pico, using the MAX6675 thermocouple-to-digital converter. We will use SPI(Serial Peripheral Interface) to communicate between RP2040 and MAX6675. At the end of the article, we also show how to show the temperature data on an OLED display.
What is a K-Type Thermocouple?
A thermocouple is a temperature sensor commonly used to measure high temperatures in industrial applications. They consist of two different wires joined at an end(called the junction). A temperature difference between this junction and the other ends of the metal can generate a voltage, which can be measured to estimate the temperature at the hot end.
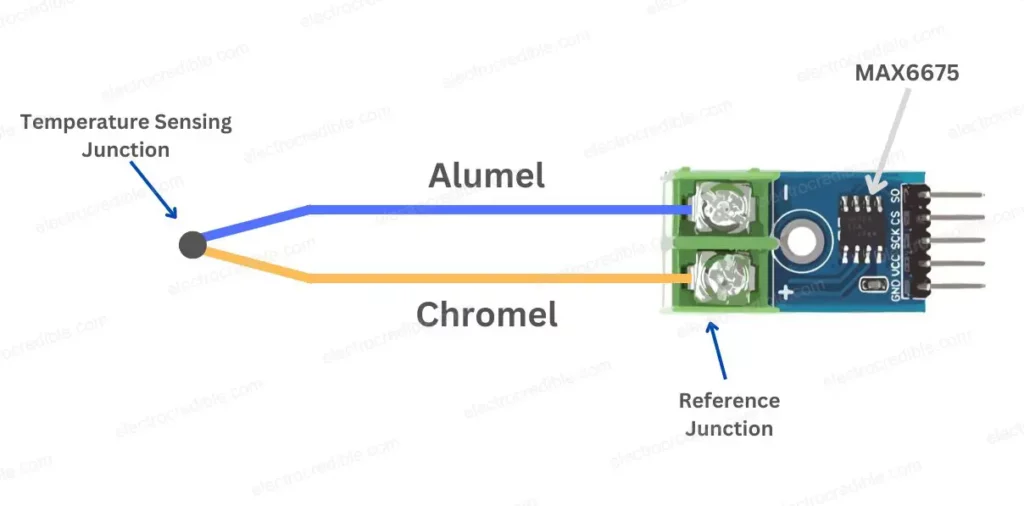
A K-type thermocouple is made up of two alloys- chromel and alumel. It can measure temperatures ranging from −200 °C to +1350 °C. In the image above, the temperature in the reference point can be used to estimate the temperature at the hot end(temperature sensing junction).
MAX6675 Pinout & Specifications
Below is the pinout of the most commonly used MAX6675 breakout board.
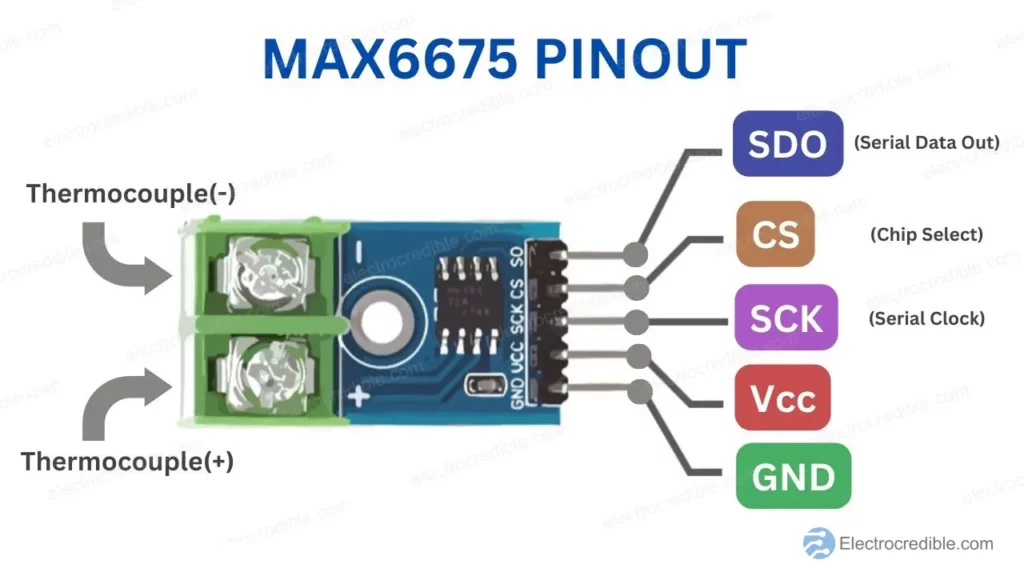
MAX6675 Pinout Description
| PIN | DESCRIPTION |
| SDO | Serial Data Output Pin. |
| CS | Chip Select Pin: Set it low to enable the serial interface. |
| SCK | Serial Clock Input for Synchronizing data transmission. |
| VCC | Power supply pin: 3V to 5.5V. |
| GND | Ground of power supply. |
Specifications
MAX6675 helps in easily interfacing a K-type thermocouple with a microcontroller. Its main features are:
- Direct Digital Conversion of Type -K Thermocouple Output
- SPI communication interface.
- 12-Bit, 0.25°C Resolution.
- Cold-Junction compensation.
MAX6675 module has a temperature-sensing diode onboard. This diode is used to read the temperature at the cold end, which is generally the ambient temperature. The voltage difference between the thermocouple output and the sensing diode is used to calculate the temperature read by the thermocouple.
For further information, you can view the datasheet of MAX6675.
Prerequisites For Interfacing MAX6675 With Raspberry Pi Pico
- A Raspberry Pi Pico or Pico W running MicroPython.
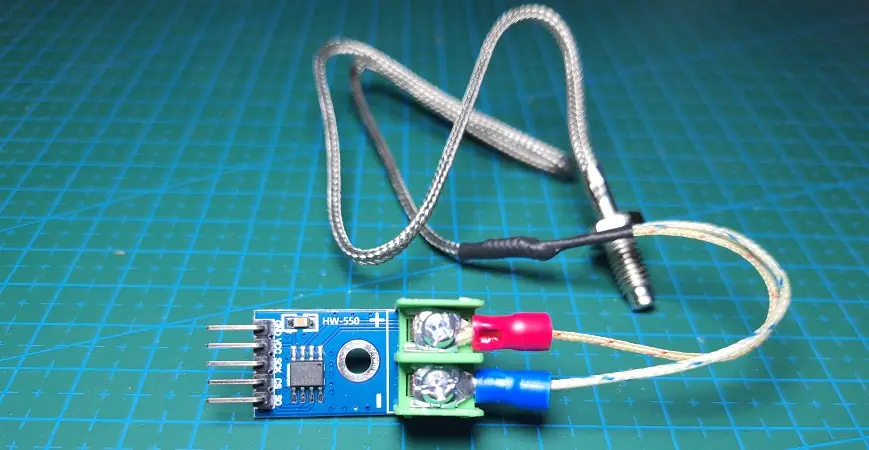
- MAX6675 K-type Thermocouple.
- Breadboard and connecting wires.
- A 16×2 I2C LCD(optional).
Your Raspberry Pi Pico needs to be preloaded with a MicroPython UF2 file to program it in MicroPython. You can read our getting started guide for Raspberry Pi Pico where we show all the steps required to start programming RP2040 in MicroPython.

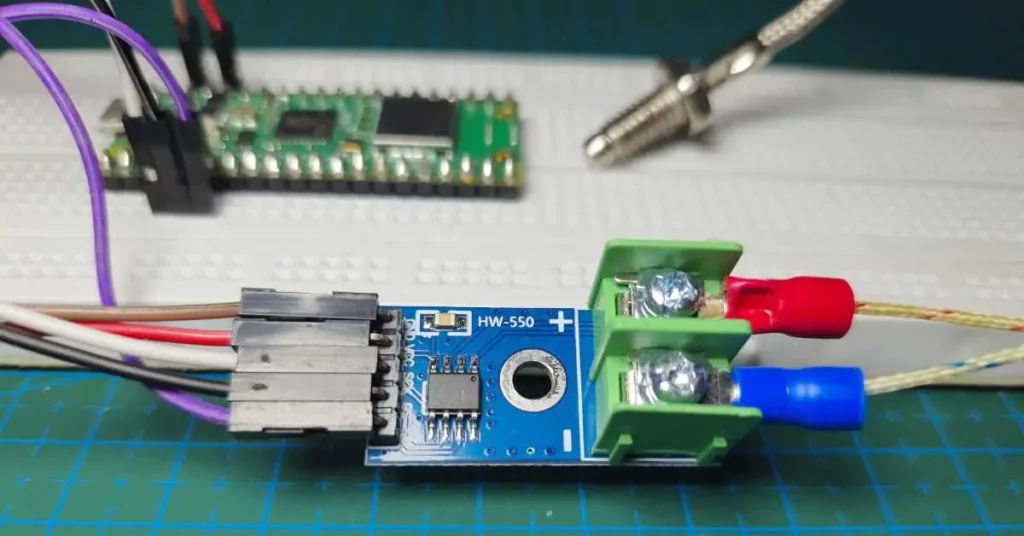
Wiring Of Raspberry Pi Pico W With MAX6675
The wiring diagram below illustrates how we can connect the MAX6675 thermocouple with a Raspberry Pi Pico W (Recommended read: Raspberry Pi Pico & Pico W Pinout Guide.)

| Pi Pico Pin | MAX6675 Pin |
| GPIO2(Pin 4) | SCK |
| GPIO3(Pin 5) | CS |
| GPIO4(Pin 6) | SO |
| GND(Pin18) | GND |
| 3V3(Pin 36) | VCC |
Remember to connect the thermocouple leads with proper polarity to the MAX6675 breakout board. Generally, the red wire connects to the positive terminal and the blue wire connects to the negative terminal.
MAX6675 MicroPython Library
MicroPython library for MAX6675 needs to be saved to your Pico to read the sensor. Open Thonny IDE, and create a new file(File>New). Paste the following code:
import time
class MAX6675:
    MEASUREMENT_PERIOD_MS = 220

    def __init__(self, sck, cs, so):
        """
        Creates new object for controlling MAX6675
        :param sck: SCK (clock) pin, must be configured as Pin.OUT
        :param cs: CS (select) pin, must be configured as Pin.OUT
        :param so: SO (data) pin, must be configured as Pin.IN
        """
        # Thermocouple
        self._sck = sck
        self._sck.low()

        self._cs = cs
        self._cs.high()

        self._so = so
        self._so.low()

        self._last_measurement_start = 0
        self._last_read_temp = 0
        self._error = 0

    def _cycle_sck(self):
        self._sck.high()
        time.sleep_us(1)
        self._sck.low()
        time.sleep_us(1)

    def refresh(self):
        """
        Start a new measurement.
        """
        self._cs.low()
        time.sleep_us(10)
        self._cs.high()
        self._last_measurement_start = time.ticks_ms()

    def ready(self):
        """
        Signals if measurement is finished.
        :return: True if measurement is ready for reading.
        """
        return time.ticks_ms() - self._last_measurement_start > MAX6675.MEASUREMENT_PERIOD_MS

    def error(self):
        """
        Returns error bit of last reading. If this bit is set (=1), there's problem with the
        thermocouple - it can be damaged or loosely connected
        :return: Error bit value
        """
        return self._error

    def read(self):
        """
        Reads last measurement and starts a new one. If new measurement is not ready yet, returns last value.
        Note: The last measurement can be quite old (e.g. since last call to `read`).
        To refresh measurement, call `refresh` and wait for `ready` to become True before reading.
        :return: Measured temperature
        """
        # Check if new reading is available
        if self.ready():
            # Bring CS pin low to start protocol for reading result of
            # the conversion process. Forcing the pin down outputs
            # first (dummy) sign bit 15.
            self._cs.low()
            time.sleep_us(10)

            # Read temperature bits 14-3 from MAX6675.
            value = 0
            for i in range(12):
                # SCK should resemble clock signal and new SO value
                # is presented at falling edge
                self._cycle_sck()
                value += self._so.value() << (11 - i)

            # Read the TC Input pin to check if the input is open
            self._cycle_sck()
            self._error = self._so.value()

            # Read the last two bits to complete protocol
            for i in range(2):
                self._cycle_sck()

            # Finish protocol and start new measurement
            self._cs.high()
            self._last_measurement_start = time.ticks_ms()

            self._last_read_temp = value * 0.25

        return self._last_read_temp
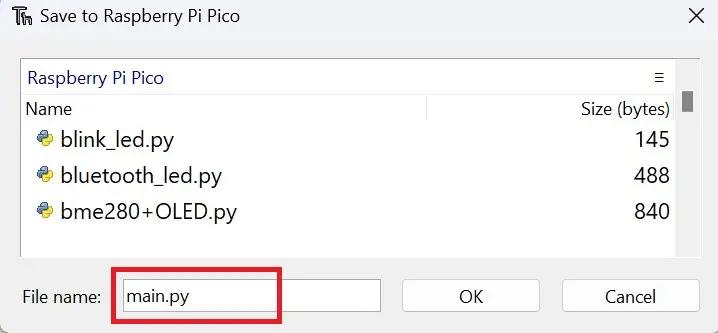
Click on File>Save as and save it to Raspberry Pi Pico

Name the library as max6675.py
MicroPython Code To Interface MAX6675 With Pi Pico
The following steps will demonstrate how to use Thonny IDE to upload MicroPython code to interface MAX6675 thermocouple with Raspberry Pi Pico.
- With all connections done, connect the Pico to your computer using a USB cable. Open Thonny IDE, and paste the following code into a new project.
from max6675 import MAX6675
from machine import Pin
import time

sck = Pin(2, Pin.OUT)
cs = Pin(3, Pin.OUT)
so = Pin(4, Pin.IN)

sensor = MAX6675(sck, cs , so)

while True:
    print("temperature=")
    print(sensor.read())
time.sleep(1)Code language: Python (python)- Run the code by clicking the Run icon or by pressing the F5 key.

- Save the script to your Raspberry Pi Pico.
- Save the script as main.py or with any other name with a “.py” filename extension.
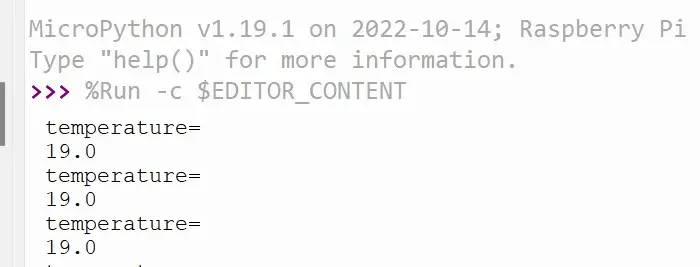
- You should now see the sensor output on the Shell of Thonny IDE as shown in the image below.
MicroPython Code Explanation
First, we import the necessary libraries for our script to work. For the MAX6675 sensor, we import the MAX6675 class from the ‘max6675’ library. From the ‘machine’ module, we import the Pin class so that we can set the pins as input/output. The ‘time’ module is also imported to introduce delays in our code.
from max6675 import MAX6675
from machine import Pin
import timeCode language: Python (python)
Set the pins for communicating with MAX6675. The Raspberry Pi Pico pins connected to SCK and CS pins are set as output. The SO pin is connected to GPIO4 as set as input. This pin will carry the temperature data from the MAX6675 sensor to Pico.
sck = Pin(2, Pin.OUT)
cs = Pin(3, Pin.OUT)
so = Pin(4, Pin.IN)Code language: Python (python)
An object called ‘sensor’ is created and initialized with the input and output pins that we set in the code above.
sensor = MAX6675(sck, cs , so)Code language: Python (python)Inside the while loop, we obtain the temperature in Celcius using the ‘sensor.read()’ function and print it. The loop continues printing with a delay of 1 second in between prints.
while True:
    print("temperature=")
    print(sensor.read())
    time.sleep(1)Code language: Python (python)
Connecting An LCD
Let us now try to connect a 16×2 LCD with Raspberry Pi Pico to view the output from the MAX6675 sensor. We shall use I2C communication in Raspberry Pi Pico for interfacing the LCD.
We need to install the appropriate MicroPython module for the LCD display to work. Kindly follow our guide to interface Raspberry Pi Pico with LCD to learn more about installing the library.
After the library scripts are installed, upload the following code to your Raspberry Pi Pico and save it as ‘main.py’.
from max6675 import MAX6675
from machine import Pin,I2C
from lcd_api import LcdApi
from pico_i2c_lcd import I2cLcd
import time
sck = Pin(2, Pin.OUT)
cs = Pin(3, Pin.OUT)
so = Pin(4, Pin.IN)
sensor = MAX6675(sck, cs , so)
I2C_ADDR = 0x27
I2C_NUM_ROWS = 2
I2C_NUM_COLS = 16
i2c = I2C(0, sda=machine.Pin(0), scl=machine.Pin(1), freq=400000)
lcd = I2cLcd(i2c, I2C_ADDR, I2C_NUM_ROWS, I2C_NUM_COLS)
while True:
lcd.clear()
print(sensor.read())
lcd.putstr("Temperature={}C".format(int(sensor.read())))
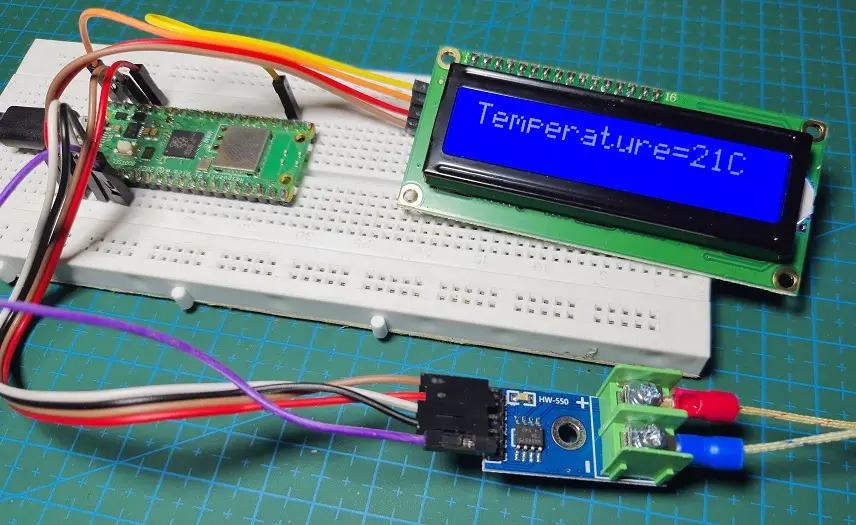
time.sleep(1)Code language: Python (python)When the code is successfully uploaded, you must see the temperature displayed on the LCD as shown in the image below.
Code explanation
After importing the libraries for I2C LCD, we set the I2C address and set the rows and columns of our LCD. You can find the I2C address of your LCD which is discussed in the LCD interfacing guide that is linked above. Note that if you are using a 20×4 LCD, set ‘I2C_NUM_ROWS= 4’ and ‘I2C_NUM_COLS = 20’.
I2C_ADDR     = 0x27
I2C_NUM_ROWS = 2
I2C_NUM_COLS = 16Code language: Python (python)
An object called ‘i2c’ is initialized with GPIO0 as the SDA pin and GPIO1 as the SCL pin for the LCD. An ‘lcd’ object is also created with the parameters specifying the I2C address, rows, and columns.
i2c = I2C(0, sda=machine.Pin(0), scl=machine.Pin(1), freq=400000)
lcd = I2cLcd(i2c, I2C_ADDR, I2C_NUM_ROWS, I2C_NUM_COLS)Code language: Python (python)
Finally, in the while loop, we print the value of the temperature obtained from the MAX6675 sensor.
lcd.putstr("Temperature={}C".format(int(sensor.read())))Code language: Python (python)Troubleshooting
What if the distance between MAX6675 and Raspberry Pi Pico is more than the wires provided with the sensor? MAX6675 IC and the point where the thermocouple wires are attached to the MAX6675 board should be at the same temperature. So avoid extending the thermocouple wires by using additional wires. The wires used for SPI communication can be elongated up to some extent if the thermocouple wires are short.
Wrapping Up
MAX6675 is a preferred sensor in industrial applications as it can withstand high temperatures. There is also an internal temperature sensor in Raspberry Pi Pico that you can use, although it is not as accurate as MAX6675. We also have guides on other environmental sensors which you can take a look at:
- Raspberry Pi Pico BME280 Interfacing Guide Using MicroPython.
- Raspberry Pi Pico BMP280 Tutorial-Interface Using MicroPython.
- Raspberry Pi Pico DHT22 Interfacing Tutorial.
- Raspberry Pi Pico DHT11 MicroPython – Easy Interfacing Guide.
Thank you for reading. Please leave your thoughts in the comments below.
Leave a Reply