This tutorial will guide you to connect Raspberry Pi Pico to the HC-05 Bluetooth module. We will use an Android app to send commands to Pi Pico and control the onboard LED using Bluetooth. The original variant of Raspberry Pi Pico RP2040 did not have Bluetooth built into the development board. But the newer variant released in 2022 comes with the Infineon CYW4343 chip, which features a single-band 2.4 GHz Wi-Fi 4 (802.11n) and Bluetooth 5.1.
If you would like to use the onboard Bluetooth on Raspberry Pi Pico, read our guide – Raspberry Pi Pico W Bluetooth(BLE) Using MicroPython | Point-to-Point Communication.
Brief Overview Of The HC-05 Bluetooth Module
The HC-05 facilitates easy wireless serial connections using Bluetooth SPP(Serial Port Protocol). It uses the CMOS-enabled CSR Bluecore 04-External single-chip Bluetooth system with AFH (Adaptive Frequency Hopping Feature). Its footprint is just 12.7 mm by 27 mm.
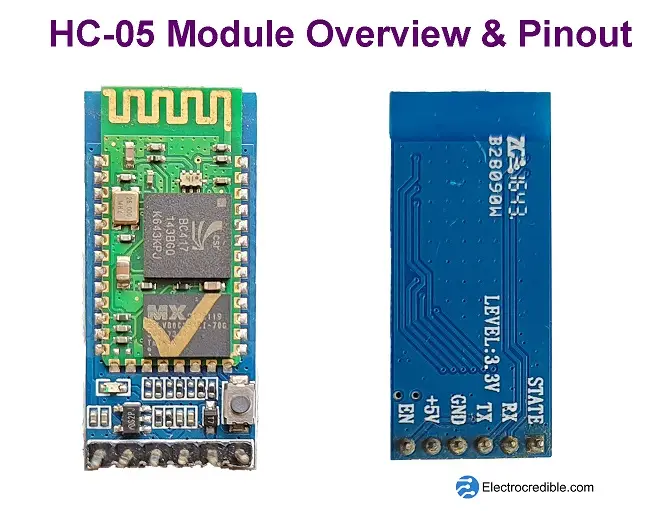
Features Of HC-05:
- Supply voltage: 1.8 to 3.6V.
- Built-in 2.4GHz antenna.
- Sensitivity: -80dBm(Typical).
- RF transmission power: Up to +4dBm.
- Programmable baud rate. Default Baud rate: 38400.
View the datasheet of HC-05 to know more about it.
The HC-06 is almost similar in functionality to the HC-05. While HC-05 can act both as a master and slave device, HC-06 can only act as a slave device. HC-05 and HC-06 are interchangeable in most cases. Although this guide is primarily demonstrated using HC-05, it will also work with HC-06.
Prerequisites For Raspberry Pi Pico W Bluetooth Interfacing
- A Raspberry Pi Pico running MicroPython.
- Breadboard.
- HC-05/HC-06 Bluetooth module.
- USB cable to connect to a PC.
We have an in-depth article on using serial communication with Raspberry Pi Pico. Please take a look if you wish to know how MicroPython code can be used to send and receive serial data.
How To Interface HC-05 Bluetooth Module With Raspberry Pi Pico & Blink The Onboard LED.
We shall use UART(Universal Asynchronous Receiver-Transmitter) to receive serial data from the Bluetooth module. UART is a protocol/hardware implementation, for device-to-device serial communication. Raspberry Pi Pico has two UARTs, namely UART0 and UART1.
The image below demonstrates the Raspberry Pi Pico pinout related to Serial communication via UART.
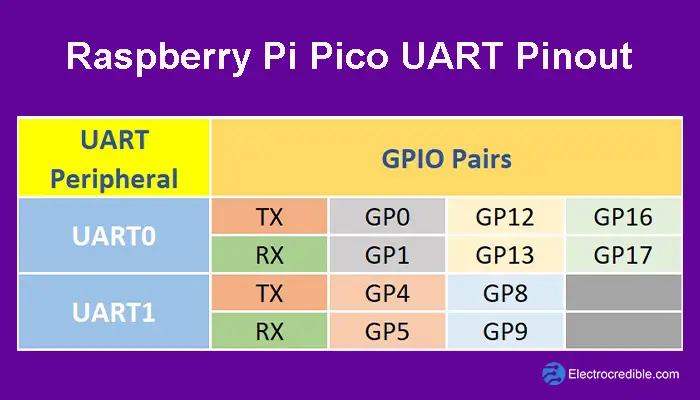
Refer to the pin diagram of Pi Pico below to view the location of RX and TX pins in relation to the GPIOs.

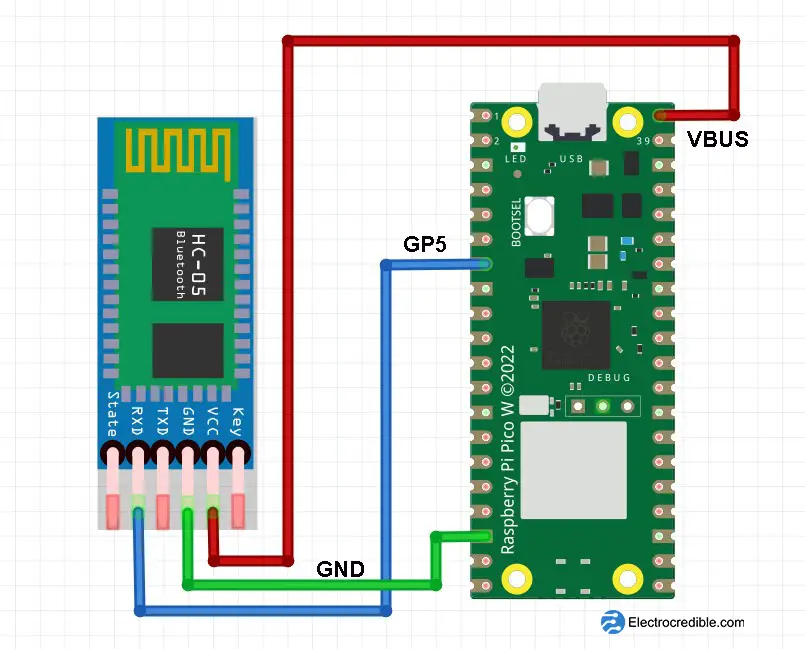
Schematic Of Bluetooth Module With Raspberry Pi Pico W
You can use any of the UART pins to communicate with the Bluetooth module. Here we will be using GP5 of UART1 to receive data from the Bluetooth module. Connect your Pi Pico to the HC-05 Bluetooth module as shown in the figure below.
Installation Of Android App & Pairing With The Bluetooth Module
With the connections done properly, connect your Pico to the computer via a USB cable. The Bluetooth module should now power up. It generally comes with a red LED to show the device status that blinks when idle. Search for the Bluetooth module in your phone’s settings and pair it with it. In my case, the PIN used to pair was 1234. Try 0000 if 1234 does not work.
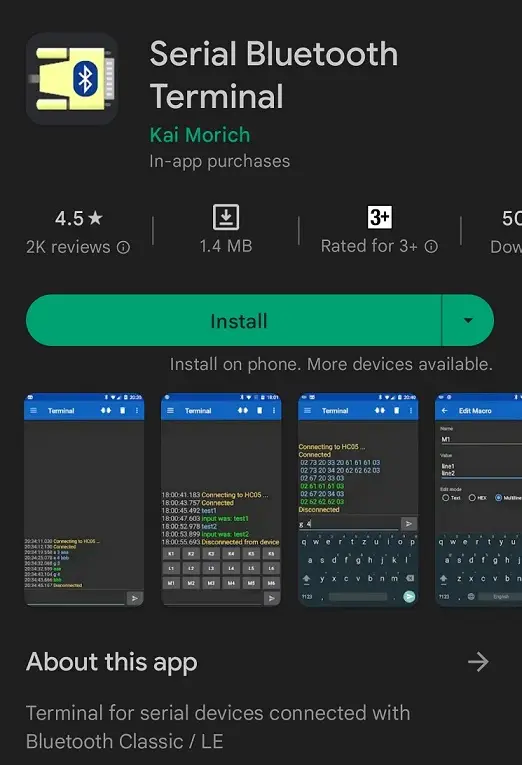
- Download an app named Serial Bluetooth Terminal from the Google Play Store.
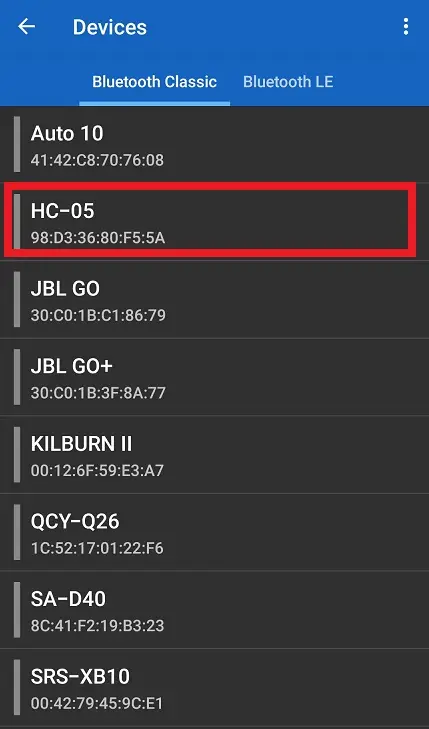
- Turn ON your phone’s Bluetooth. Open the app and go to Menu>Devices.
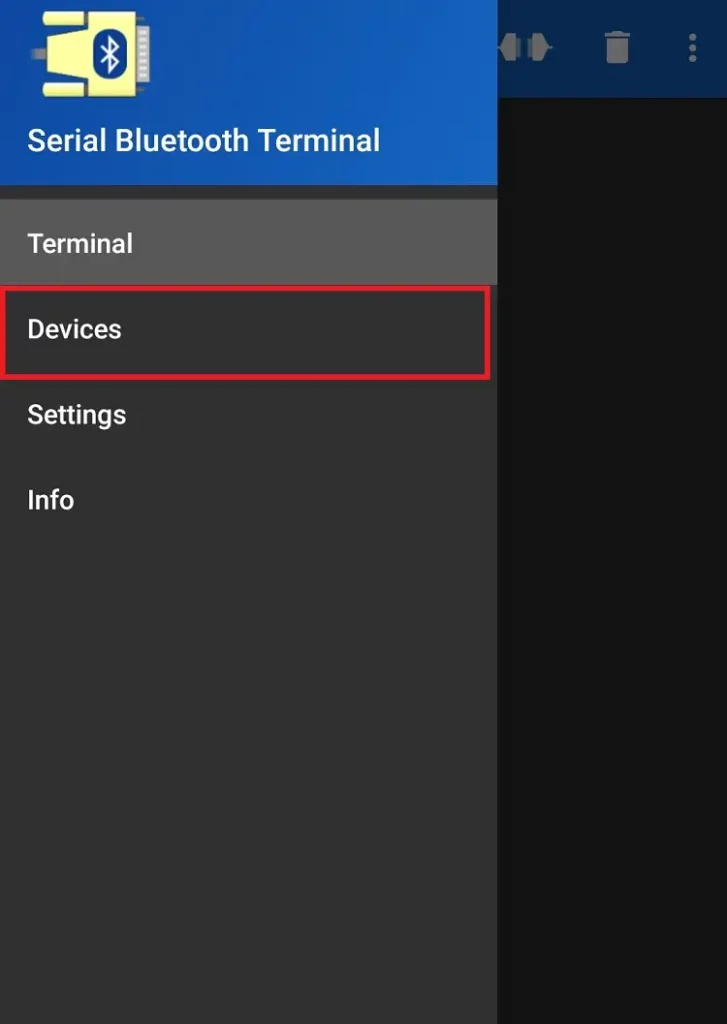
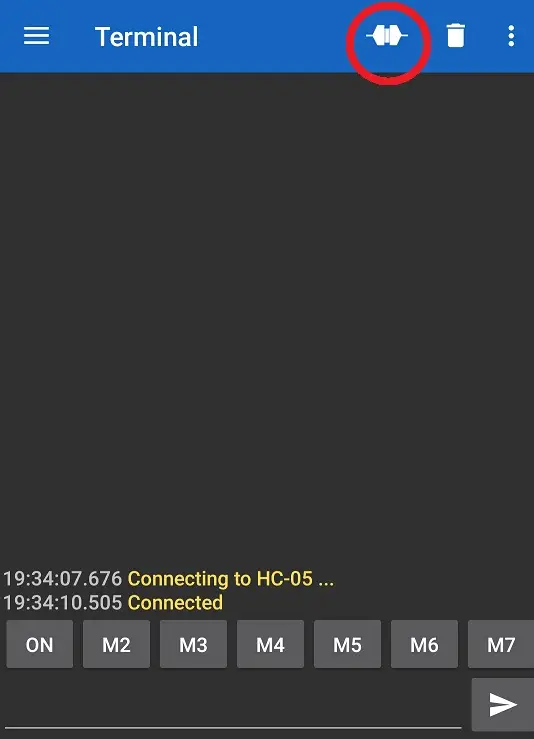
- Tap on the device name (HC-05) to connect with it.
The app will display “Connected” when the connection is successful. You can also use the Connect icon in the upper part of the screen to connect to the device in the future.
Read Bluetooth Data Using MicroPython Code
Make sure that your Raspberry Pi Pico RP2040 is preloaded with the MicroPython UF2 file. If not, you can follow our guide Getting Started With Raspberry Pi Pico & Raspberry Pi Pico W Using MicroPython. This guide uses the Thonny IDE. You can also use the uPycraft IDE which is also described in our getting started guide. For macOS users, follow our guide to program RPi Pico on macOS.
- With the connections done, open Thonny IDE and paste the following code in a blank project window.
#Source: Electrocredible.com, Language: MicroPython.
from machine import Pin,UART
uart = UART(1, baudrate=9600, tx=Pin(4), rx=Pin(5))
led = Pin("LED", Pin.OUT)

while True:
    if uart.any(): #Returns 0 if there are no characters available
        data = uart.read() #returns a bytes object containing the bytes read in
        print(data)
        if data== b'switchon\r\n':
            led.high()
            print("LED is ON")
        elif data==b'switchoff\r\n':
            led.low()
print("LED is OFF")Code language: Python (python)- Run the code using F5 or the Run icon.

- Save the code to your Raspberry Pi Pico.

- Name the script as bluetooth.py or any other filename with a “.py” filename extension and save it.
Control Onboard LED using Bluetooth In Raspberry Pi Pico
In the Serial Bluetooth Terminal app, type “a” in the textbox (without the quotes) and tap on send.

The onboard LED in Pi Pico must now light up. The Shell in Thonny will also display the received data as b’a\r\n’ and will print the line “LED is ON”.
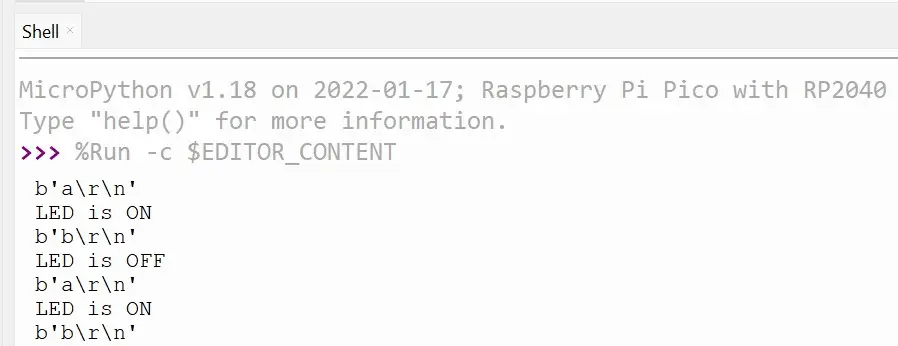
Similarly, you can turn off the LED by sending the command “b” without the quotes. You can also send string commands such as “TurnLEDon”.
Suggested Article: Raspberry Pi Pico Onboard Temperature Sensor Tutorial Using MicroPython
Leave a Reply