In this tutorial, you will learn to connect Raspberry Pi Pico W to the internet by making an HTTP GET request.
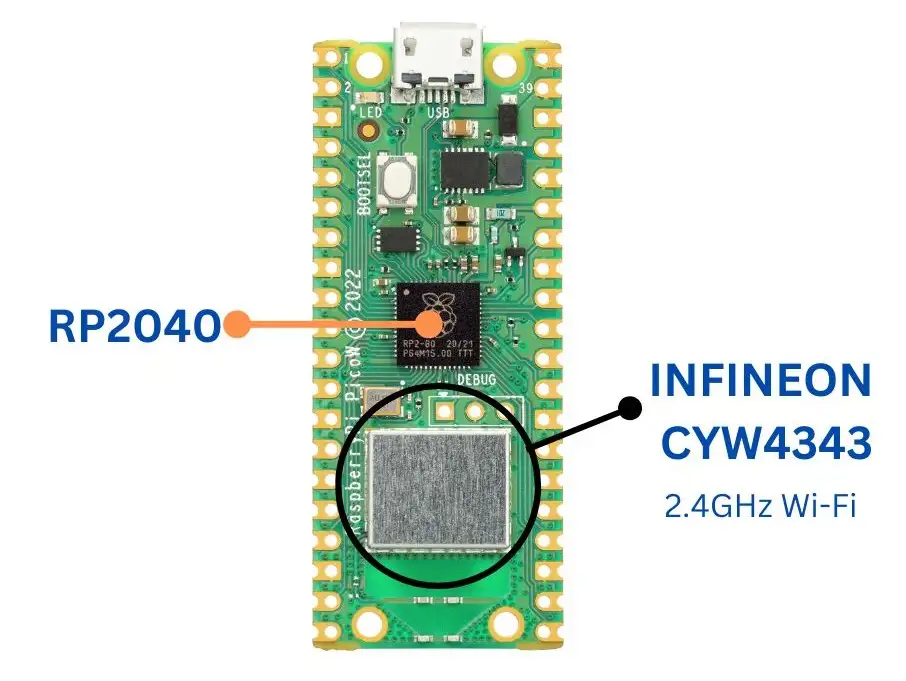
Raspberry Pi Pico W features an Infineon CYW4343 chip with a single-band 2.4 GHz Wi-Fi 4 (802.11n) and Bluetooth 5.1. If you are interested in using Bluetooth, read:
An example is discussed to connect to a Wi-Fi network using MicroPython. The code has robust features such as multiple connection attempts and auto-reconnection in case of connection failure.
What We Need For This Project
- A Raspberry Pi Pico W.
- A USB cable to connect to a computer.
- A Wifi router or Wi-Fi hotspot with active internet access.
How to Use MicroPython to Access the Internet
MicroPython comes with prebuilt methods to send and retrieve data via the internet. WiFi connection can be configured using the Network module in MicroPython. There are two Wi-Fi interfaces available: one for the station and one for the access point. In station mode, Raspberry Pi Pico can connect to a Wi-Fi router. In the Access Point mode, Raspberry Pi Pico can act as a WiFi hotspot.

We can create a network object called wlan and set it in the station mode in the following way-
import network
wlan = network.WLAN(network.STA_IF)Code language: Python (python)
To use it as a hotspot, we must use the code network.WLAN(network.AP_IF).
The HTTP protocol has different methods such as GET, POST, PATCH, PUT, DELETE, etc. These methods are essential for communication through Internet protocol.
For example, the GET method is used to retrieve data from a server, and the POST method is used to send data to a server. These methods are readily available in MicroPython using the urequests library.
We can get the data from a URL by using the line of code urequests.get(URL).
MicroPython Wi-Fi Example For Raspberry Pi Pico W
Please ensure that the Raspberry Pi Pico is loaded with the MicroPython UF2 file. The steps to install MicroPython on Raspberry Pi Pico are discussed in our article Getting Started With Raspberry Pi Pico & Raspberry Pi Pico W.
The following code demonstration will be explained using the Thonny IDE. You can also follow our guide to program Raspberry Pi Pico using the uPyCraft IDE.
- Connect your Raspberry Pi Pico W to a computer.
- Open Thonny IDE and set the interpreter to MicroPython(Raspberry Pi Pico) by going to Tools>Options>Interpreter.
- Copy and paste the following code into a new project.
import time
import network
import urequests as requests

ssid = 'MyNetwork'
password = 'MyPassword'

wlan = network.WLAN(network.STA_IF)

#function to connect to Wi-Fi network
def cnctWifi():

    wlan.active(True)
    wlan.connect(ssid, password)

    # Wait for connection to establish
    max_wait = 10
    while max_wait > 0:
        if wlan.status() < 0 or wlan.status() >= 3:
                break
        max_wait -= 1
        print('waiting for connection...')
        time.sleep(1)

    # Manage connection errors
    if wlan.status() != 3:
        print('Network Connection has failed')
    else:
        print('connected')
        status = wlan.ifconfig()
        print( 'ip = ' + status[0] )

#function to send http get request
def getData():
    try:
        data=requests.get("http://api.open-notify.org/iss-now.json")
        location=data.json()
        print("ISS latitude={}".format(location['iss_position']['latitude']))
        print("ISS longitude={}".format(location['iss_position']['longitude']))
        data.close()

    except:
        print("could not connect (status =" + str(wlan.status()) + ")")

cnctWifi()

while True:
    if wlan.isconnected():
        print("sending get request...")
        getData()
    else:
        print("attempting to reconnect...")
        wlan.disconnect()
        cnctWifi()
    time.sleep(1)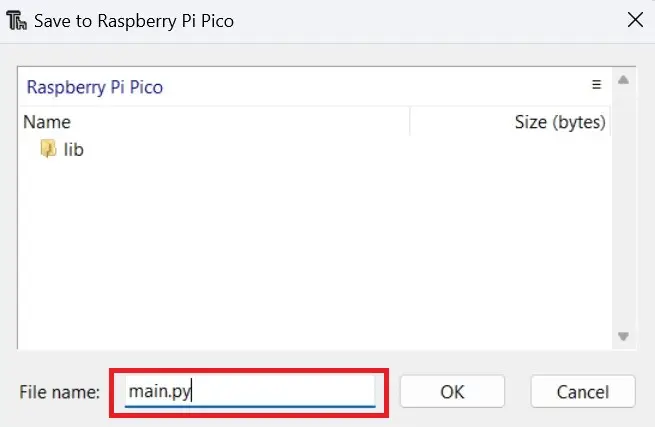
Code language: Python (python)- Save the script to your Raspberry Pi Pico.

- Save the code as main.py or any other name with a ‘.py’ filename extension.
- Run the code by clicking on F5 or the RUN icon.

You should now see the result in the Shell window of Thonny as shown below.


Code Explanation
We first import three necessary modules. The time module will be used to add delays, network module will help to connect to Wi-Fi and the requests library will be used to make HTTP requests.
import time
import network
import urequests as requestsCode language: Python (python)
In the variables ssid and password, assign the SSID and password of your Wi-Fi network. The SSID and password shown here are only placeholders and need to be changed.
ssid = 'MyNetwork'
password = 'MyPassword'Code language: Python (python)
An object is created of the WLAN class in station mode(STA_IF).
wlan = network.WLAN(network.STA_IF)Code language: Python (python)The cnctWifi() is used to establish a connection to the Wi-Fi network. In this function, we first activate the network interface and connect to it using our network credentials.
    wlan.active(True)
    wlan.connect(ssid, password)Code language: CSS (css)
A while loop then checks if communication has been established, and makes 10 repeated attempts to connect if the connection fails.
# Wait for connection to establish
max_wait = 10
while max_wait > 0:
    if wlan.status() < 0 or wlan.status() >= 3:
            break
    max_wait -= 1
    print('waiting for connection...')
    time.sleep(1)Code language: Python (python)
The function wlan.status() gives the wireless connection status. The statuses are defined in the Infineon CYW4343 wireless driver. The following table shows the various codes returned by the function corresponding to the network status.
| STATUS | CODE |
| LINK DOWN | 0 |
| LINK JOIN | 1 |
| LINK NOIP | 2 |
| LINK UP | 3 |
| LINK DOWN | -1 |
| LINK NONET | -2 |
| LINK BADAUTH | -3 |
The code below handles any communication error that may occur. If the code returned by wlan.status() is not equal to 3 (i.e. LINK UP), then the message “Network Connection has failed” is printed to notify the user.
# Manage connection errors
    if wlan.status() != 3:
        print('Network Connection has failed')
    else:
        print('connected')Code language: Python (python)
Next, we define a function called getData() to retrieve data from the internet.
We can use the exception-handling feature of Python for automatic reconnection when a Wi-Fi connection fails. The try block will check for errors while the code executes.
A variable called data is assigned the value returned by requests.get(), which is a HTTP GET method to fetch data from a server. The GET request is sent to access a publicly available JSON dataset that returns the current position of the International Space Station(ISS). You can find some other datasets in this Github link for awesome JSON datasets.
try:
        data=requests.get("http://api.open-notify.org/iss-now.json")Code language: Python (python)
JSON stands for Javascript Object Notation, which is a text-based data interchange format. The link in our example returns JSON data that looks like this-
{"message": "success", "iss_position": {"longitude": "-127.2703", "latitude": "-23.4675"}, "timestamp": 1669660972}
We need to extract meaningful information from this text data. Let us concern ourselves with the latitude and longitude information. The location instance reads the JSON data from the HTTP GET request. Then we print the data in the Shell.
        location=data.json()
        print("ISS latitude={}".format(location['iss_position']['latitude']))
        print("ISS latitude={}".format(location['iss_position']['longitude']))
        data.close()Code language: Python (python)
ⓘ We need to close the data object after the printing of data is done. If we do not close, the object may not be garbage-collected, and this might lead to a crash when an HTTP request is made inside a loop.
Finally, the except block handles the exceptions thrown by the try block. If the connection is lost or any other error occurs a relevant message is then shown to the user based on the connection status.
except:
        print("could not connect (status =" + str(wlan.status()) + ")")Code language: Python (python)
Finally, we write an infinite while loop to get data from the internet and reconnect to the network if the connection is lost.
The code block below is a conditional statement that checks if the device is currently connected to a WiFi network.
if wlan.isconnected():Code language: CSS (css)If the condition is true, indicating that the device has an active WiFi connection, the program proceeds to print the message “sending get request…” to the console. Following this message, it calls the getData() function.
This conditional check ensures that the program attempts to fetch data only when a reliable network connection is established, preventing unnecessary network requests in case of a disconnection.
If the device is not connected, the program will attempt to reconnect in the else block. The connection is first disconnected using wlan.disconnect() and the cnctWifi() function is called again in an attempt to reconnect to the network.
    print("attempting to reconnect...")
    wlan.disconnect()
    cnctWifi()Code language: PHP (php)
This MicroPython code will ensure that your Pico automatically tries to reconnect when the Wi-Fi connection is lost.
Wrapping Up
We hope you found this tutorial to connect Raspberry Pi Pico W to the internet using Wi-Fi helpful. To control devices using a web server, you can take a look at our guide to controlling a relay using a web server in Raspberry Pi Pico. Leave your thoughts in the comments below for any suggestions or queries. Thank you for reading.
Also read: How To Program Raspberry Pi Pico Using Arduino IDE.
Leave a Reply